UPDATE 27/12/14
Right, my previous pompoms were just perfect if it weren’t for the corrosion of the solder (flux, probably). The parts were re-etched and the 100-part pompom is on its way. This weekend I finalized the guns themselves.
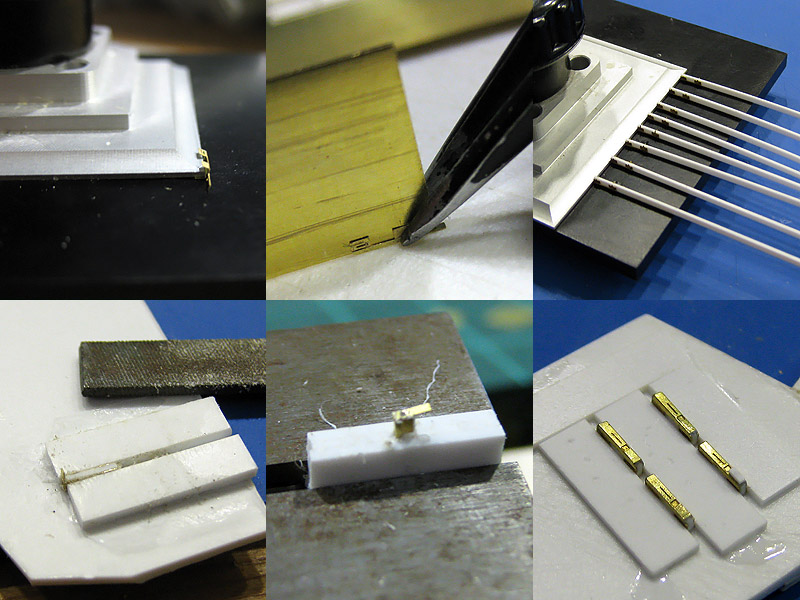
It’s very easy actually. Prefold the photoetch part with the small photoetch tool and find out it is far too crude for fine work. Find a part of brass strip to finalize the fold. Add evergreen strips that should be the right size. Be dissappointed that they are not and file all parts to the correct height using a filing jig. Replace jig from time to time. Place the part in a small jig and use the drill press to drill in the placeholder for the barrel. Be disappointed that the Proxxon drill press is unable to drill consistently, but be happy you added a photoetch part that acts as a drilling jig. Hold the part with tweezers during drilling so that the drill will not exit the part sideways. Place the guns in another jig and add a small strip on the end. File a fillet to the end of that block. Thoroughly check the gun for CA spots and clean. Add some putty to the end and sand smoothly. Find out that Tamiya putty is no longer sold in Europe and order from Singapore. Wait for the shipment while Vallejo putty disappoints you.
Because the process seems fairly repeatable I made enough guns for HMS Hood and for my next project (oh yes). Repeat the above at least: 78 times. Loose mind, despair, find will to live and continue. Fairly straightforward scratch building.

So here is half of them; these guns have a small lip to act as a spacer when added to the gun block that hasn’t been soldered yes. The barrels are on order. The mounts themselves are coming along nicely!
UPDATE 27/7/14
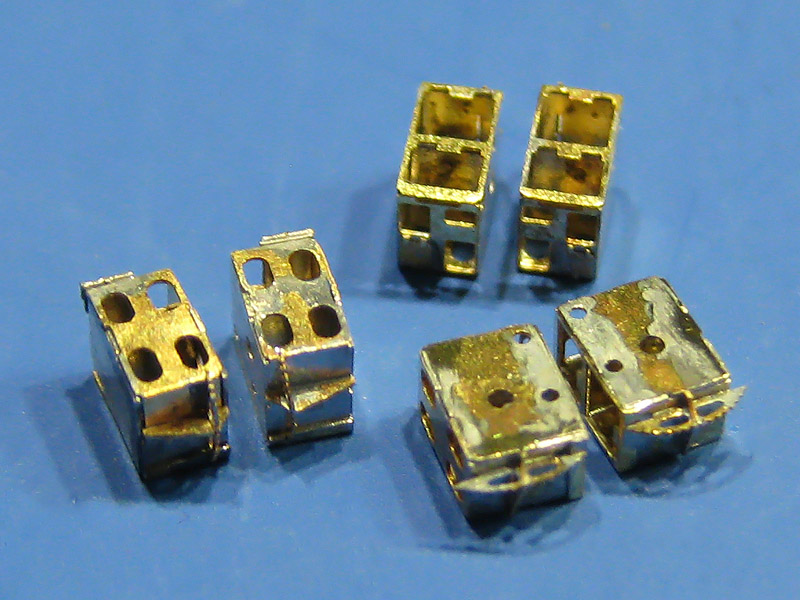
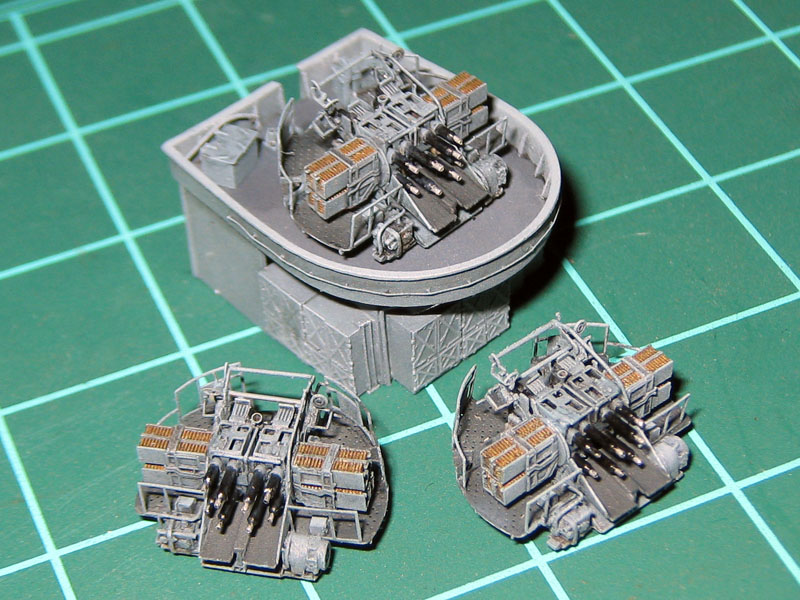
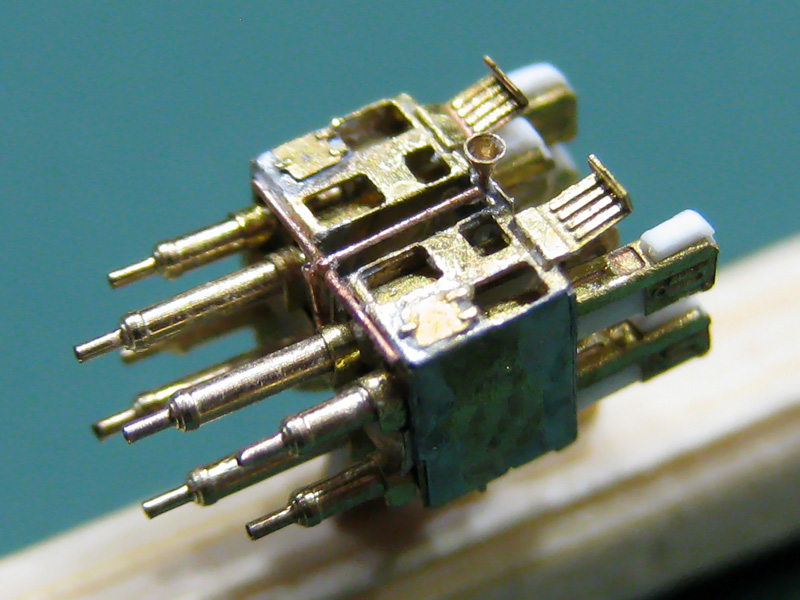
The main gun housings were soldered today with 5 etched parts for each housing: the housing itself, a center shelf that holds the upper guns, one top detail part and the two-part elevation gear parts. The housing part is sort-of self-interlocking, making it easy to hold without the risk of squeezing it with my tweezers. Soldering was quite interesting as applying heat means that some bond will release at another location (the part measures 3.3 x 2.6 x 1.9 mm only). The gun housings are supported in the center for which I made some etched part filled with styrene; the result was 0.1mm too wide and the housings ended up about 0.05mm too wide each, meaning that the sum of thee parts was 0.2mm wide and it didn’t fit. I wasted some time making the center parts fit anyway but I’ll have to add a new styrene part for that.
UPDATE 3/8/14
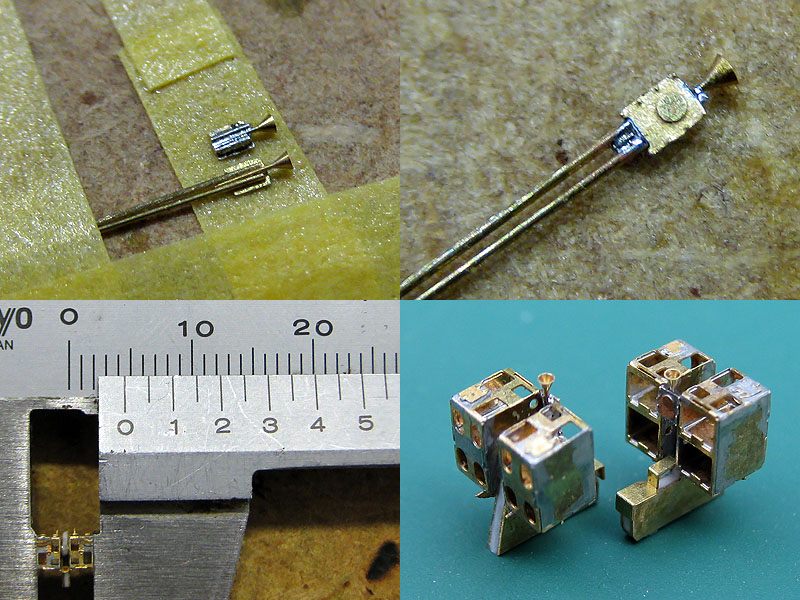
There’s a small coolant overflow cone at the end of the gun block (beautiful custom work by MASTER). I added some 0.2mm wire to either side and soldered it together so that is also works as a spacer for the two gun block halves. With some tape it’s easy to position the parts and add some solder. The first specimen was used for the general dimensions. The two wires were cut after soldering.
The gun blocks were glued to the center support after having spent 5 minutes in the ultrasonic cleaner. Fortunately, the part is now 4.5mm wide and fits the mounts. There are still a few more etched parts to keep the gun blocks together but I have to wait for the barrels to arrive. Now that some styrene is added to the model I can no longer solder and the part is delicate with superglue only until the mounts will keep the gun blocks in place.
UPDATE 10/8/14
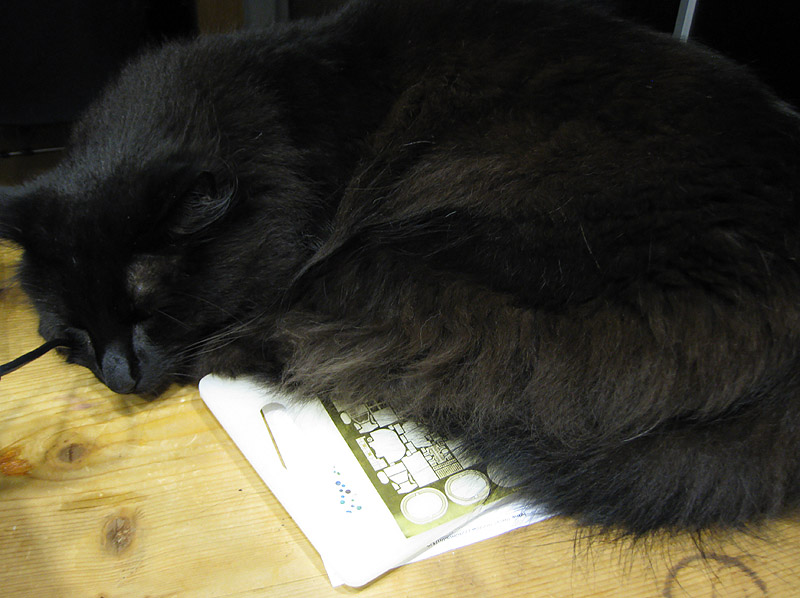
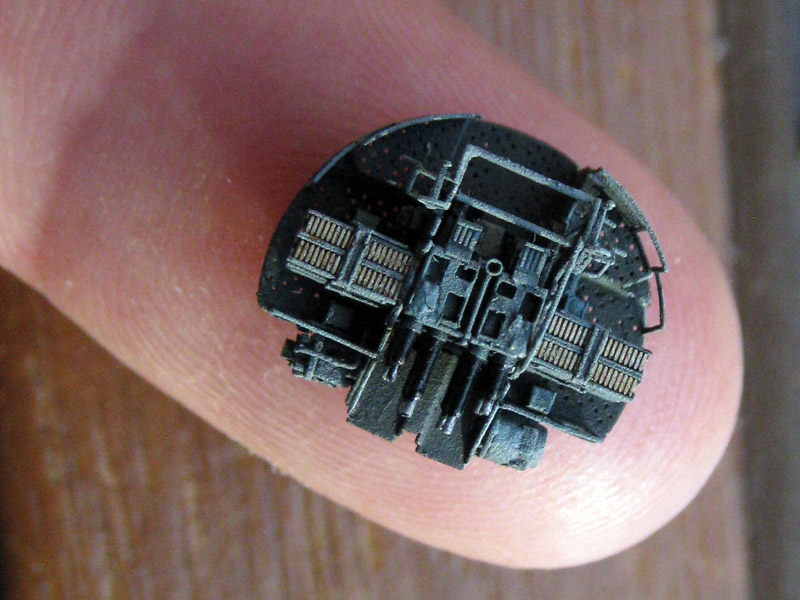
While Tiberius the Famished kept the etch set warm, I started adding the custom barrels that meanwhile arrived. You could say that the image shows how small the etch set really is, but Tiberius is a particularly large Norwegian Forest cat.
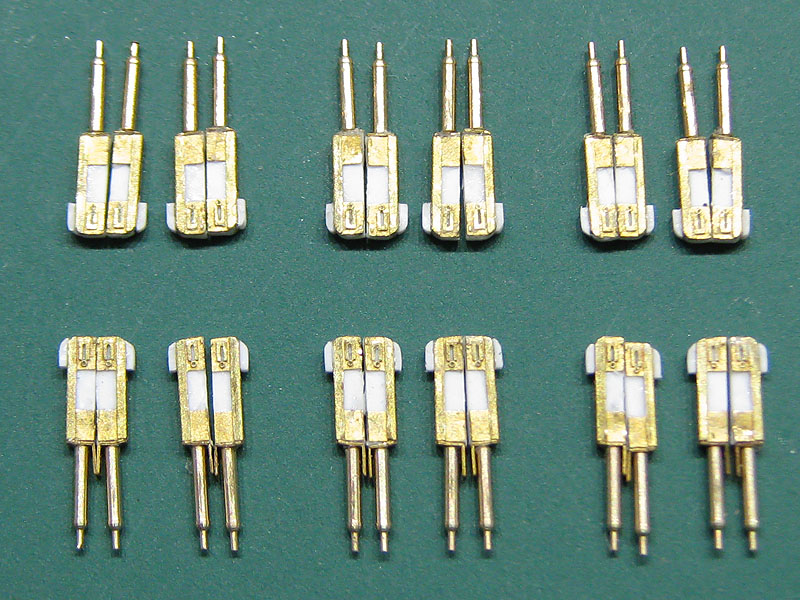
The work by Master is as good as ever and fits the tiny pompom models well. I had to do some post-drilling by hand of the styrene guns to clear all the ‘chips’. Note that the conical flash suppressor that is ever present on all pompom models is absent; HMS Hood did not yet receive the upgrade to the pompoms and the barrels are thus plain and simple. The bottom row of pompom guns have a small lip below the barrel; this is a spacer for the correct offset of the outer barrels. One gun block was finished today but another one fell apart during handling; I hope to finish the rest soon. I learned the hard way that once parts start breaking up it is a good moment to stop.
UPDATE 17/8/14
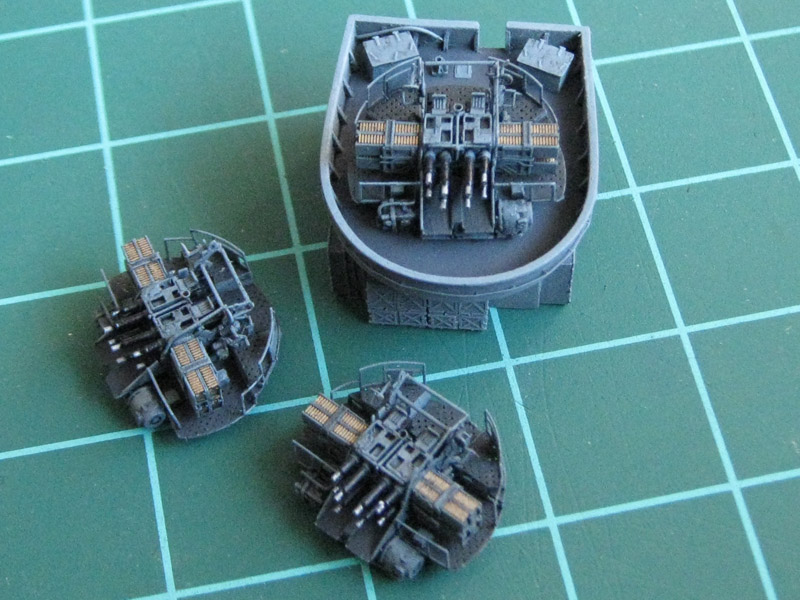
All the gun blocks are all done; the guns were inserted and final detail was added. The cooling lines to the guns are partially added; the pipes running to the barrels themselves where eventually ‘canceled’ was it was too small to do repeatedly nice. I gave the models a coat of paint. I found out that out of the four premixed colors two batches again went bad and turned into sludge. The others, same ingredients but in a different ratio, are just fine. If anyone has tips how to improve the shelf life of premixed Humbrol to more than 2 months, let me know!
UPDATE 2/9/14
One down, two to go. Soldering the sights was tricky, holding the PE part with tweezers in one hand and the soldering iron in the other… still have to add that curved bar from the portside sight to the guns but I think I’ll glue that one having spent too much time trying to solder it.
UPDATE 20/10/14

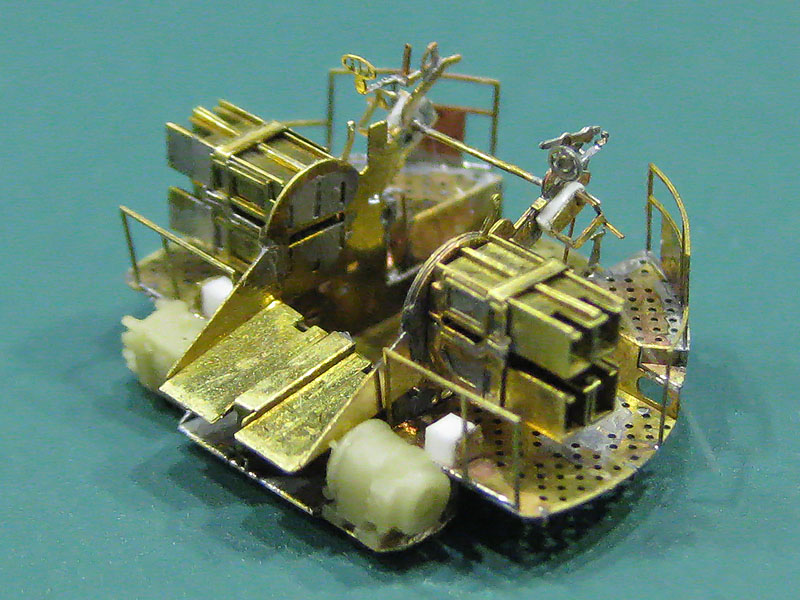
I wouldn’t want to leave the impression no progress has been made, even though most weekends have been quite busy, including a visit to the Small Scale Convention at Heiden, Germany, where the unfinished Hood was on display. There were many stunning models by the IG waterline group and the ‘German gamblers’ to study. One visitor wondered if the Lion Roar pompom set tempted me into building the rest of the ship myself? Well, it’s a bit more weird than that!
The pompoms have received some attention; here you can see one of them in my “high tech” clamping mechanism ready for some soldering of the rear railing. I have to add a few more lines of the hydraulic system and the base of the guns and then I can move on to painting.
UPDATE 27/12/14
Done! One picture with flash so they look awful, but it is snowing and light conditions plus a bad camera make bad pictures.