
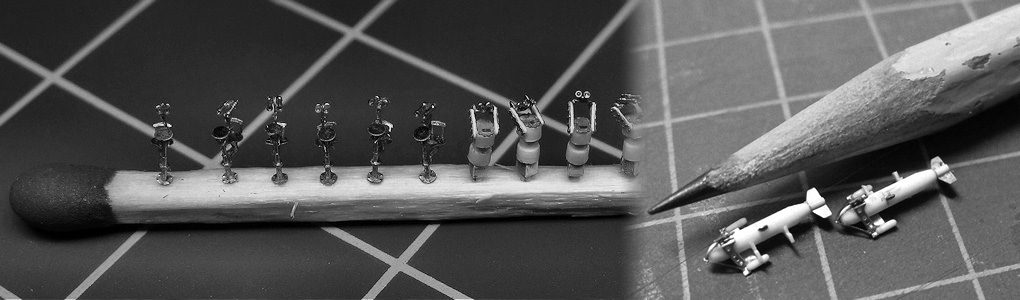
For some reason I avoided beginning to build all the mushroom vents of HMS Hood. There are many sizes and shapes and they are both numerous and small. I took the basic measurements from “Anatomy of the Ship: HMS Hood”, drawing I1: Fittings. I brought the total number of different mushroom vents down to about four and tried to classify all mushroom vents on the drawings and photographs. I decided on Large (2.4mm or 0.095″), Medium Large (2.0mm or 0.08″), Medium Small (1.22mm or 0.048″, a US punch size), and Small (0.8mm or 0.0315″). I tried to do a head count and came up with 13 large, 18 medium large, 32 medium small, and 31 small; 94 vents in total. As these parts are small I might loose them during handling and as I probably missed a few on the drawings or pictures, I had to make a nice supply of parts.
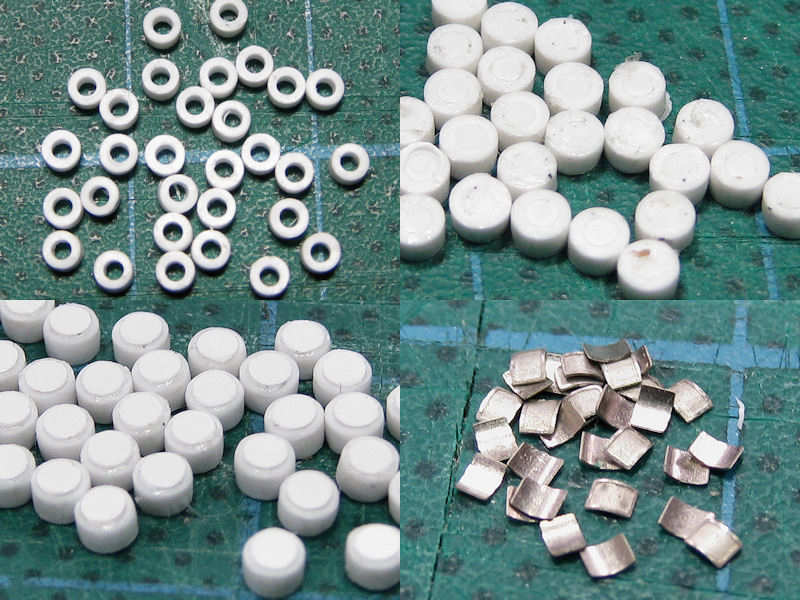
The largest vents are visible here, cut from tube. I added a disk to all rings so that the support of all mushroom vents has the same height; I now need to cut the support to length on the model, paint it, and then add the mushroom vent. This way I know what the height will be before painting the entire ship and I do not have to get the height correct of each vent to what is visible on the photographs after painting . After this disk was placed, a small disk was glued on top of the vent as detail. None of the vents on the photographs have any more detail such as a hand wheel. Too bad, would have looked nice. The grille of the vent is simulated by an etched part bent into shape and set with superglue. I only had tubes for the largest vents, the two medium sized vents were made from rod with the center punched out as explained here. This was some work with many casualties due to off-center punching, dropping to the floor, misalignment and more dropping to the floor.
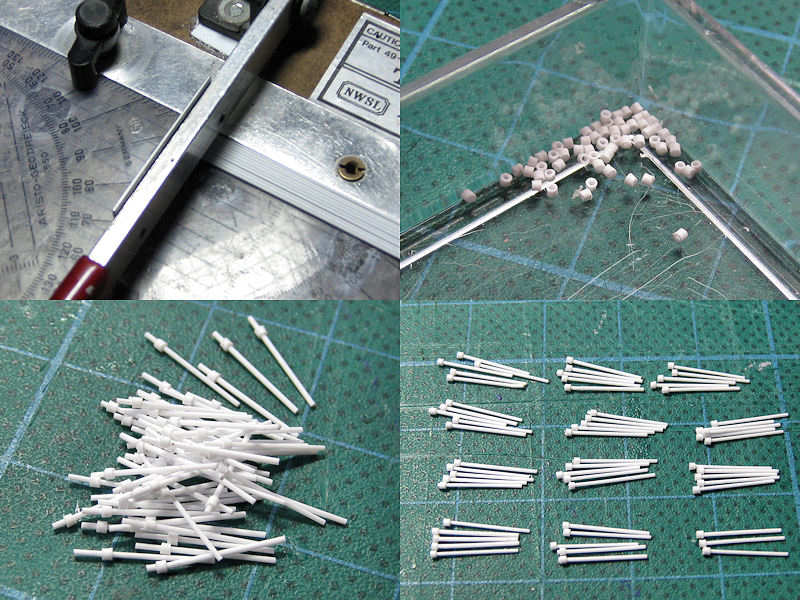
I started with the largest vents which I found to be small to begin with, and worked my way down. The smallest vents were really a challenge. I started by cutting up rod in batches of ten. They had their centers punched out by the ten-fold. I decided the smallest vents can probably be put into place prior to painting with little risk showing their white undersides or can be placed on the painted model. So, I put the rod in place. I first slid the rod in (bottom left), dipped the tip into superglue and slid the ring into place. The bottom right shows the result prior to sanding.
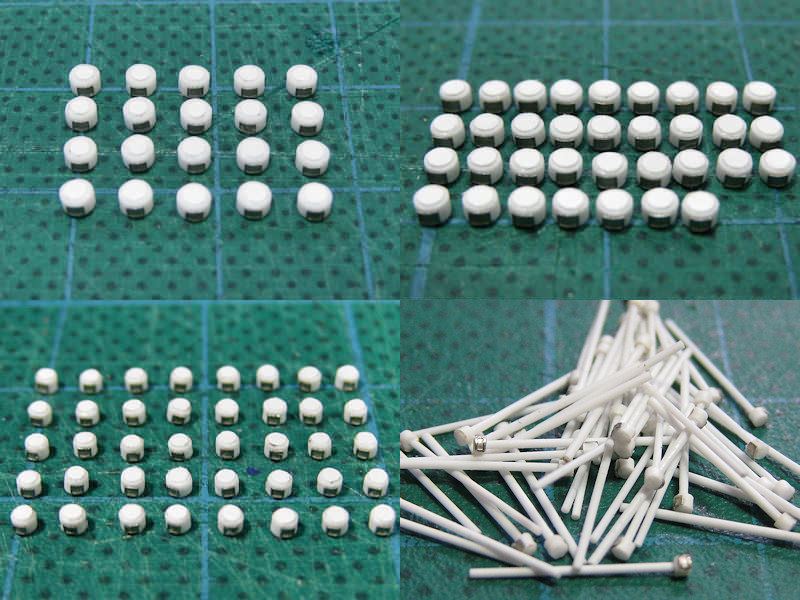
These are all the vents; 20 large, 34 medium large, 40 medium small and 58 small, 152 total. At least, 152 are left and dozens more are scattered around in the hobby room. Perhaps casting a few would have been possible, but I didn’t look forward to the prospect of casting several batches of tiny parts with a high failure rate.