So in this post a small dan buoy was found stored to the ceiling on the boat deck; I decided to add a few for colour and for fun.
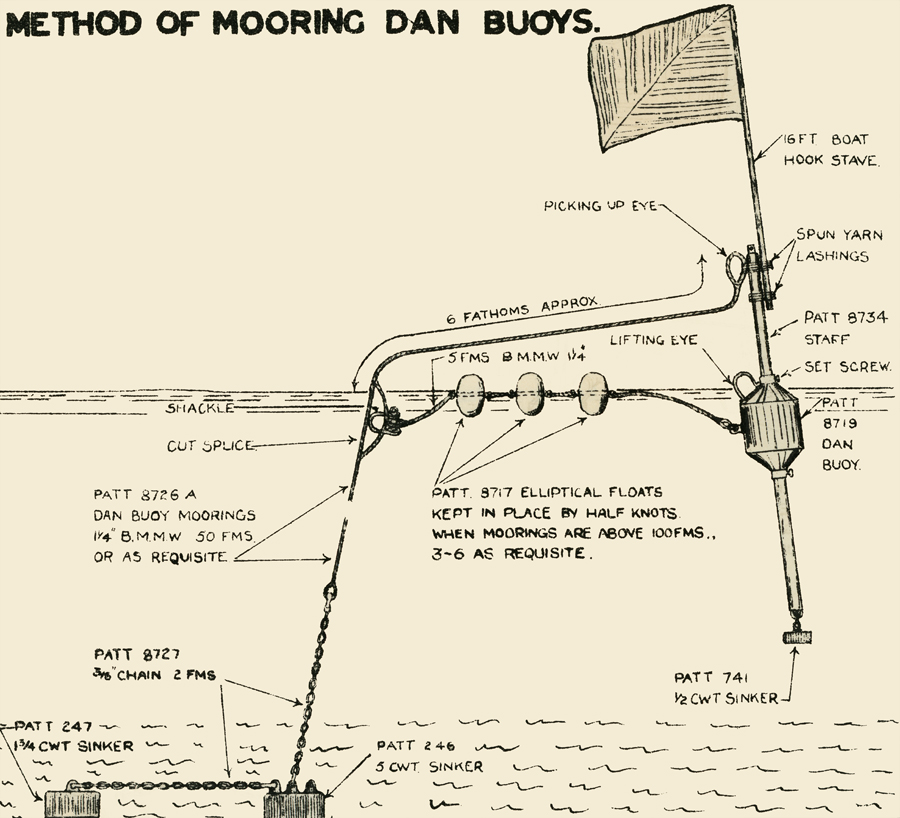
The buoy is fairly standard equipment as found the manual of seamanship, vol II (though not to scale).
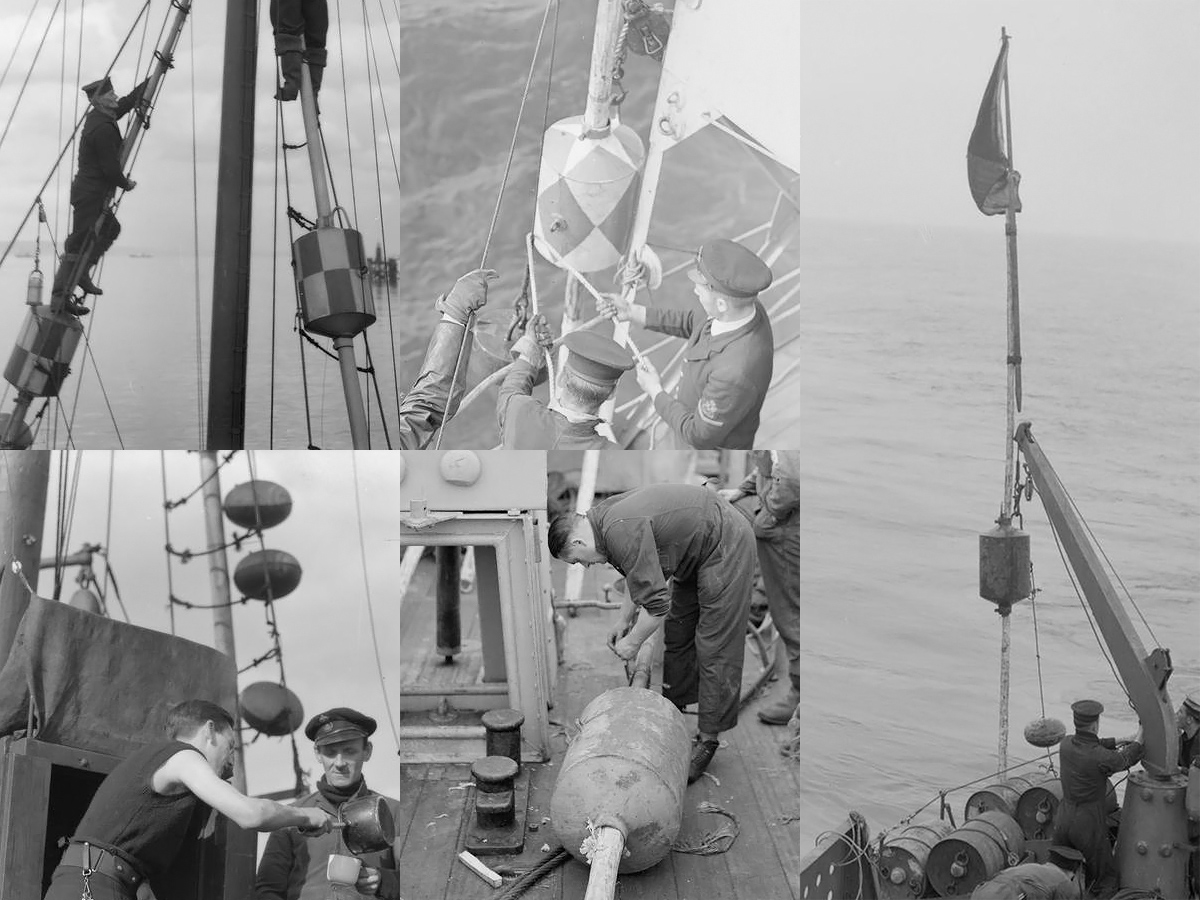
There are many pictures of the buoys aboard sweepers or so-called danlayers. At left (IWM images A 7915/7916) two dans are shows stored in the mast of HMS Rockall showing both the buoy and elliptical floaters; the entire buoy is quite large. There is a drawing in the Anatomy of the Ship Agassiz showing the buoy at an 18ft diameter with a 16 ft staff. Various creative paint scheme’s appear to have been applied and I expect the colours to be bright and vivid; usually each ship appears to have its own unique(ish) colour scheme for tracking and pickup . Perhaps the danlayers who carry many dozens have a collection of paint schemes but I haven’t found a good picture yet.
This image shows a few more buoys, but post WW-II showing a slightly different type of buoy but a similar range of patterns.
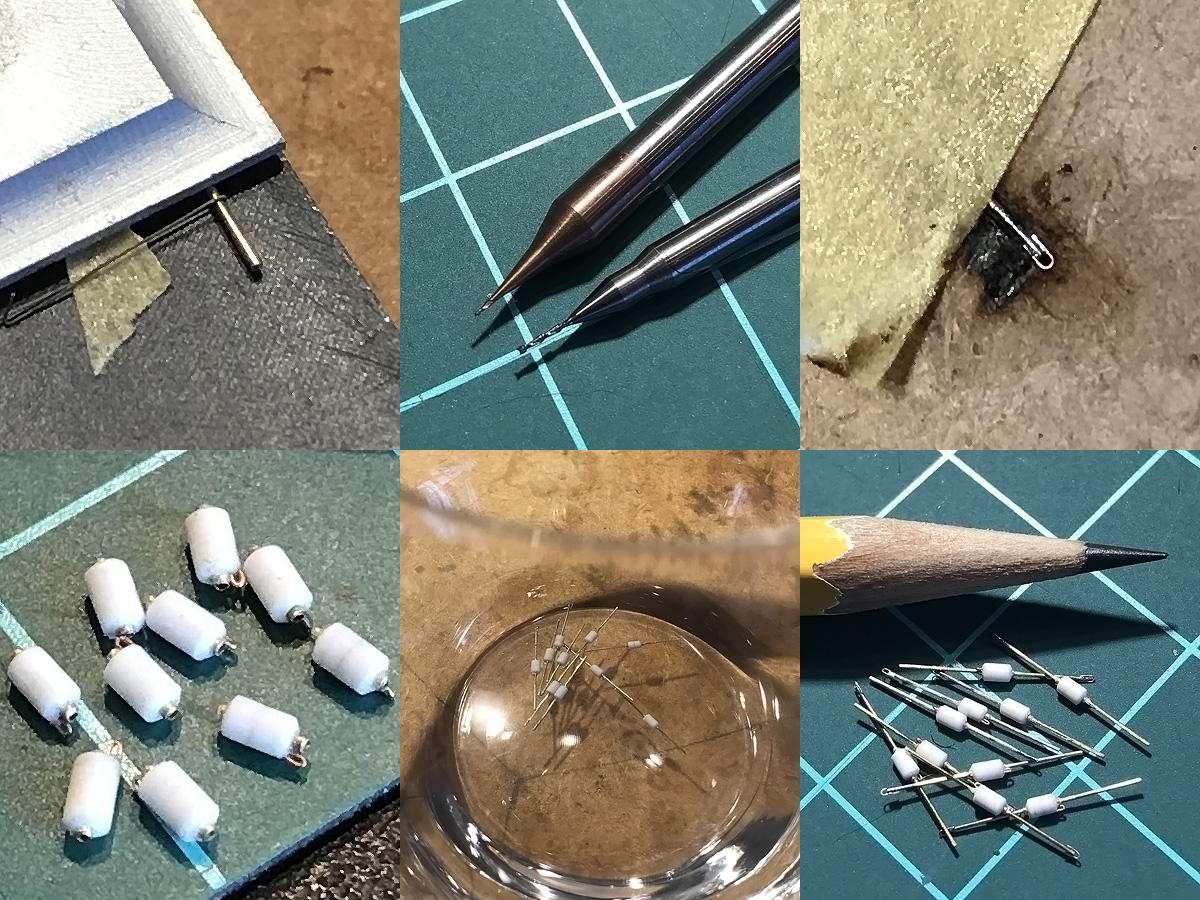
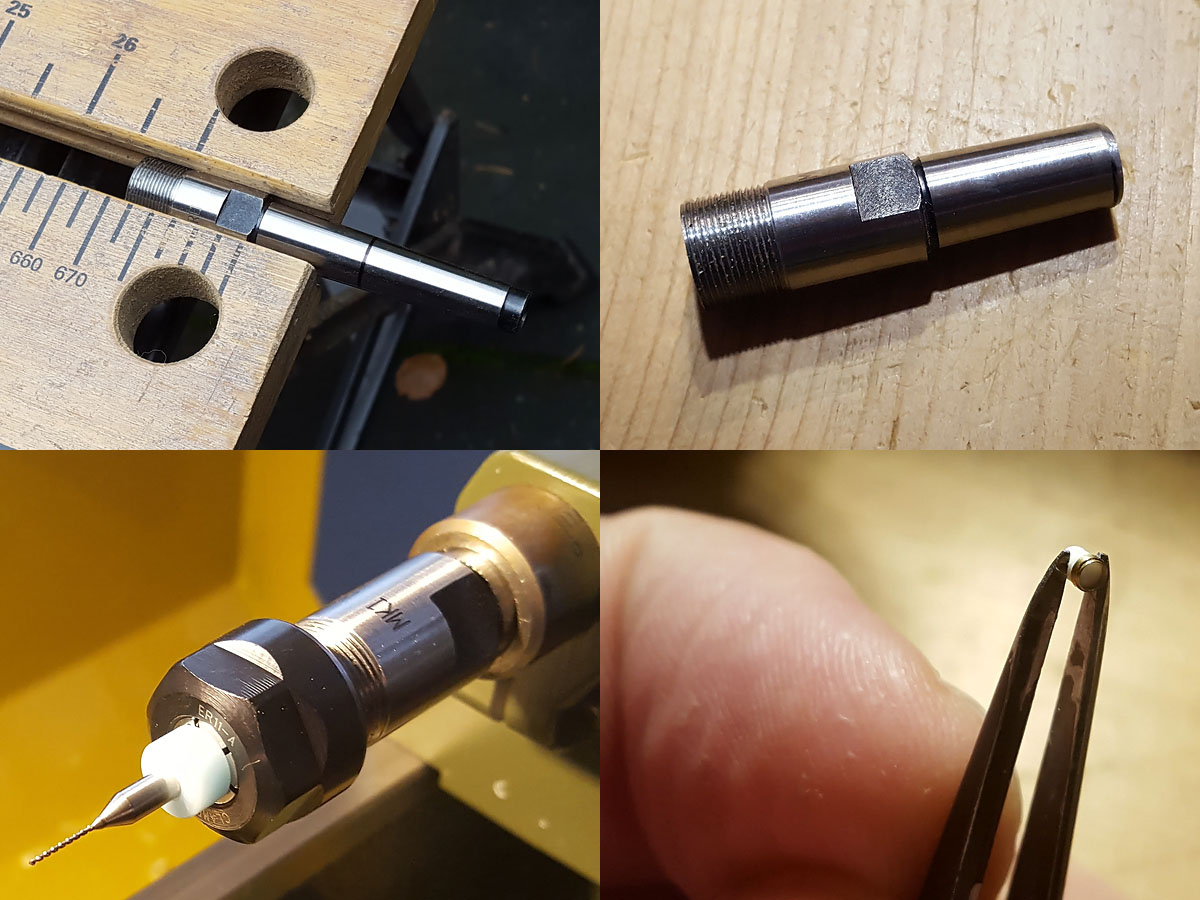
Although I see only one buoy aboard Hood I decided to build around ten. The staff was the most tricky part with a small eye to attach the sinker at the end. I made a small soldering jig and bent a 0.1mm wire around some 0.3 rod using the Hold&Fold, then trimmed to size with the chopper. I ordered a few milling bits for my new Proxxon MF70, amongst others a 0.5mm bit and a 0.3mm round bit, and milled a small 0.5mm channel in MDF with a small 0.3mm trench. This made it a bit easier to align the small eye that was then soldered very carefully (i.e., re-soldered until looking fine). The buoys themselves were made on the lathe, it was far easier to first add a chamfer to the end of half a buoy part and then joining both halves on some Albion Allows 0.5mm tube, rather than adding a chamfer to both ends of a single part. The milling machine was again used to drill in the lifting eye near the tube ( that cost me about 5 drills because I was impatient); the lifting eye is now relatively sturdy and well aligned. I threw the buoys in alcohol to remove the flux after soldering and alas; the buoys do not float… At bottom right the buoys are ready for priming.