
With the cables slowly progressing as discussed in part I a few other bits & pieces were built to fully detail the area in front of the forward breakwater.
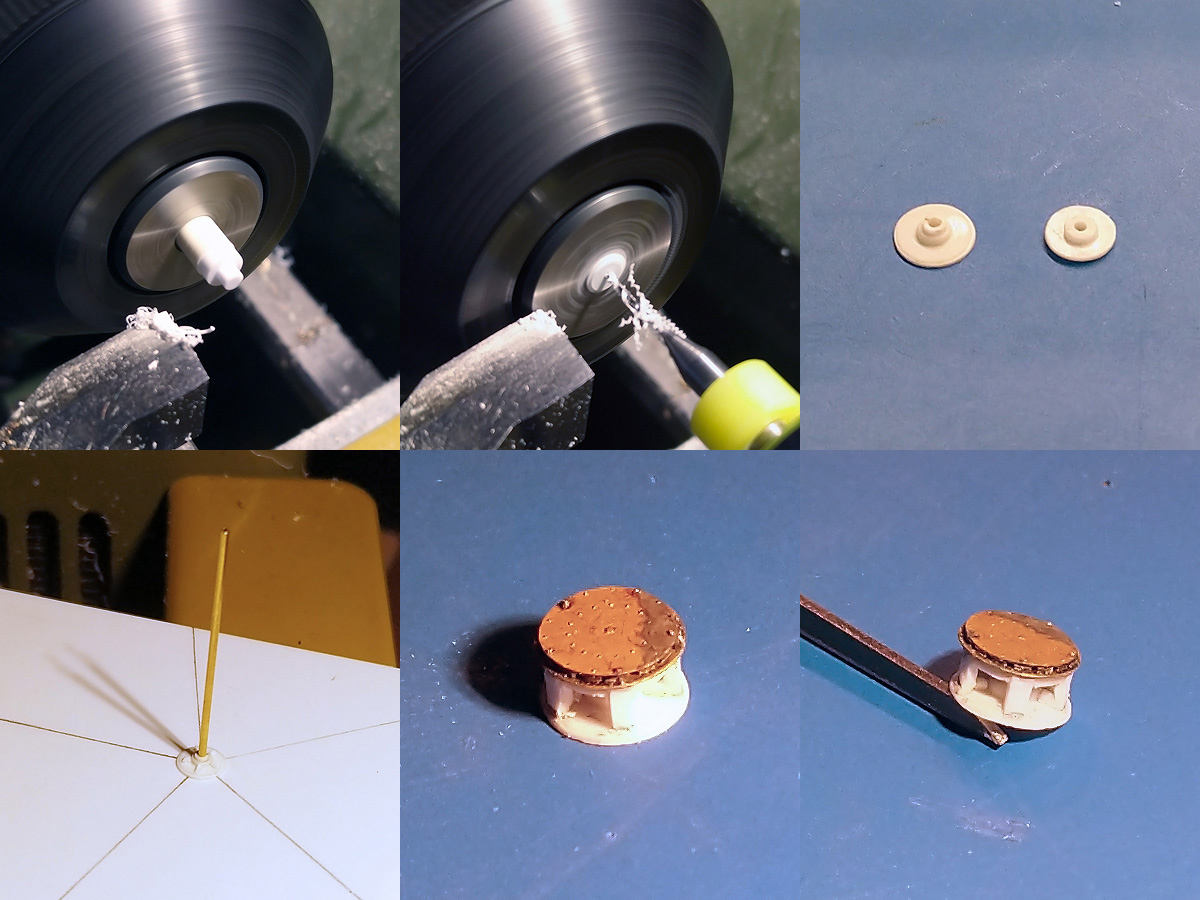
The capstan was remade simply because I lost the one I had. These are a nice combination of etched parts and styrene. The main (Napier) capstan is built up from disc and making these discs were tricky to do on a lathe: the parting tool would always deform the styrene. I played with tool angles and revs for a while, but in the end used a different approach by first cutting of a piece of rod with a small step in the diameter (top left). The part would then be reversed and work would continue from the other side with the cutting tool going fully against the chuck (carefully). The top etched parts were a bit of an experiment with three layers of PE and the small eyelets on top. Normally etching 0.1mm holes is asking for trouble as these holes are rarely etched through but now that I have a series of miniature drills I felt confident enough to drill in the etched holes; this went well enough. Too bad the eyelets are are too small to notice…
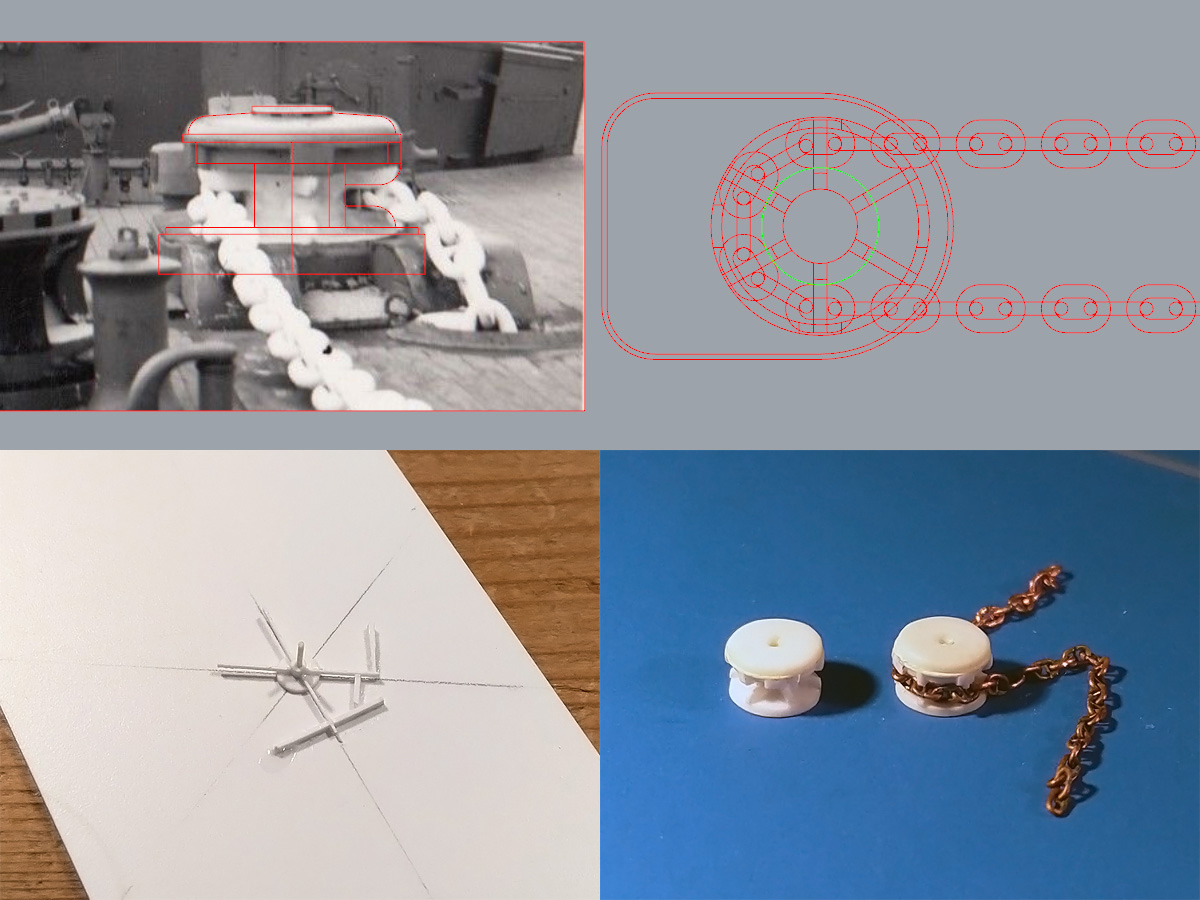
The Napier capstan can also serve as a cable holder when its whelps are removed and this holder has five spokes. The main cable holder dimensions were estimated from photographs and I estimate six spokes the holder for a proper spacing of the cable around the holder; otherwise the distance between cable on either side of the holder would not really match the photographs. A small template was helpful to keep the spacing at consistent angles.
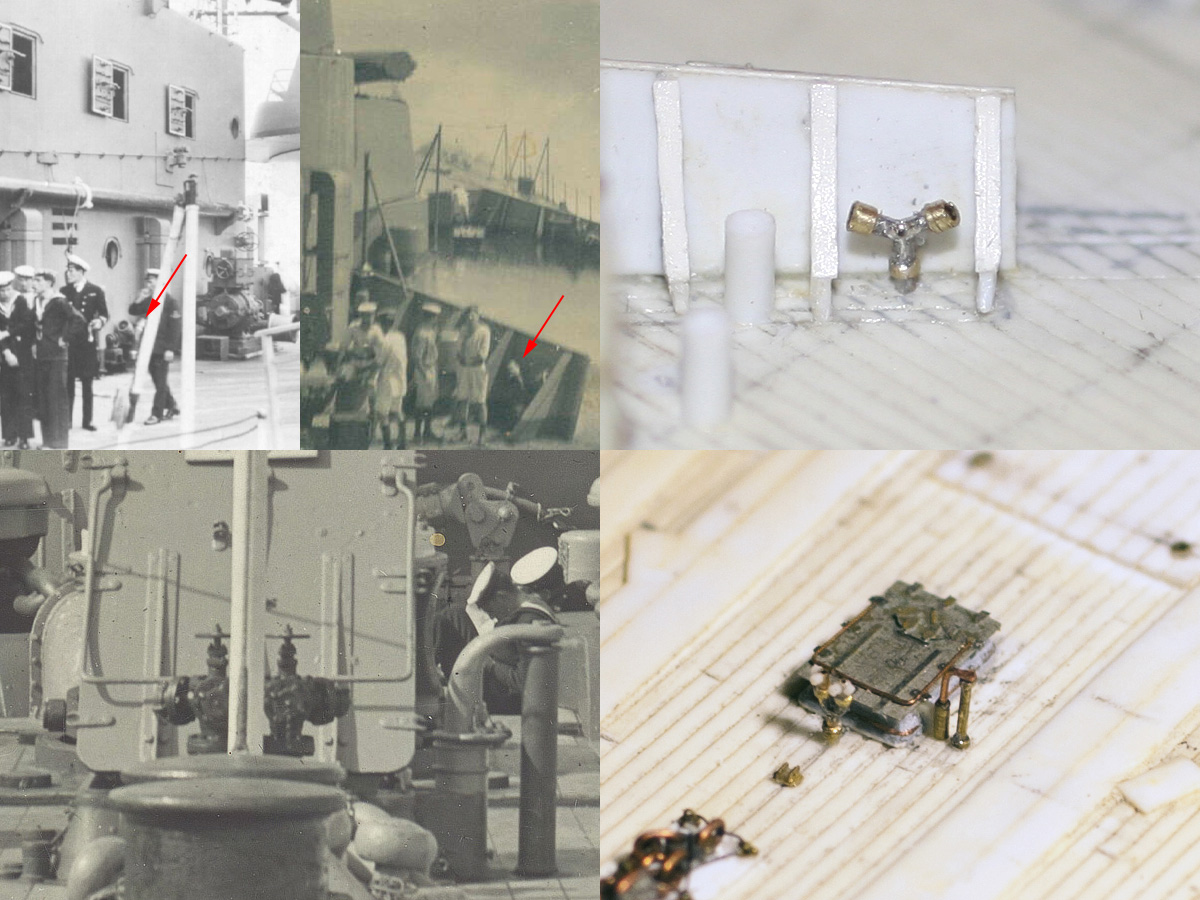
After I thought the main deck was done I made a few passes finding out small details I might have missed. The top row of images shows a small Y-shaped manifold behind the forward breakwater and against the rear quarterdeck bulkhead (a pair of them). I do not see more of them and they also do not show up on any of the plans. The forward hatch received a small support roller and some hydrant manifold. All parts are mainly soldered Albion Alloy tubes.

There are two pairs of paravane fairleads and the rear pair was replaced by some small support structure. Initially I thought this was added to keep any paravane cable away fro the degaussing cable but this structure shows up in 1939, prior to fitting the cable; a small plate was added in front of the structure when the degaussing cable was present though.
Top right shows the floor plate of the navel bonnet under construction. With the Proxxon drill press and divider it’s very easy to drill a polar array of holes on a plate. A small jig was built using 1.5mm rod and some strip with a hole punched out. The rod was made on the lathe as my experience showed that stock rod by Evergreen or Plastruct is not round enough.
The bottom right show the cable holder arrangement, a collection of strips finished by Magic Sculpt. The arrow indicates some detail but I do not know what it was for.
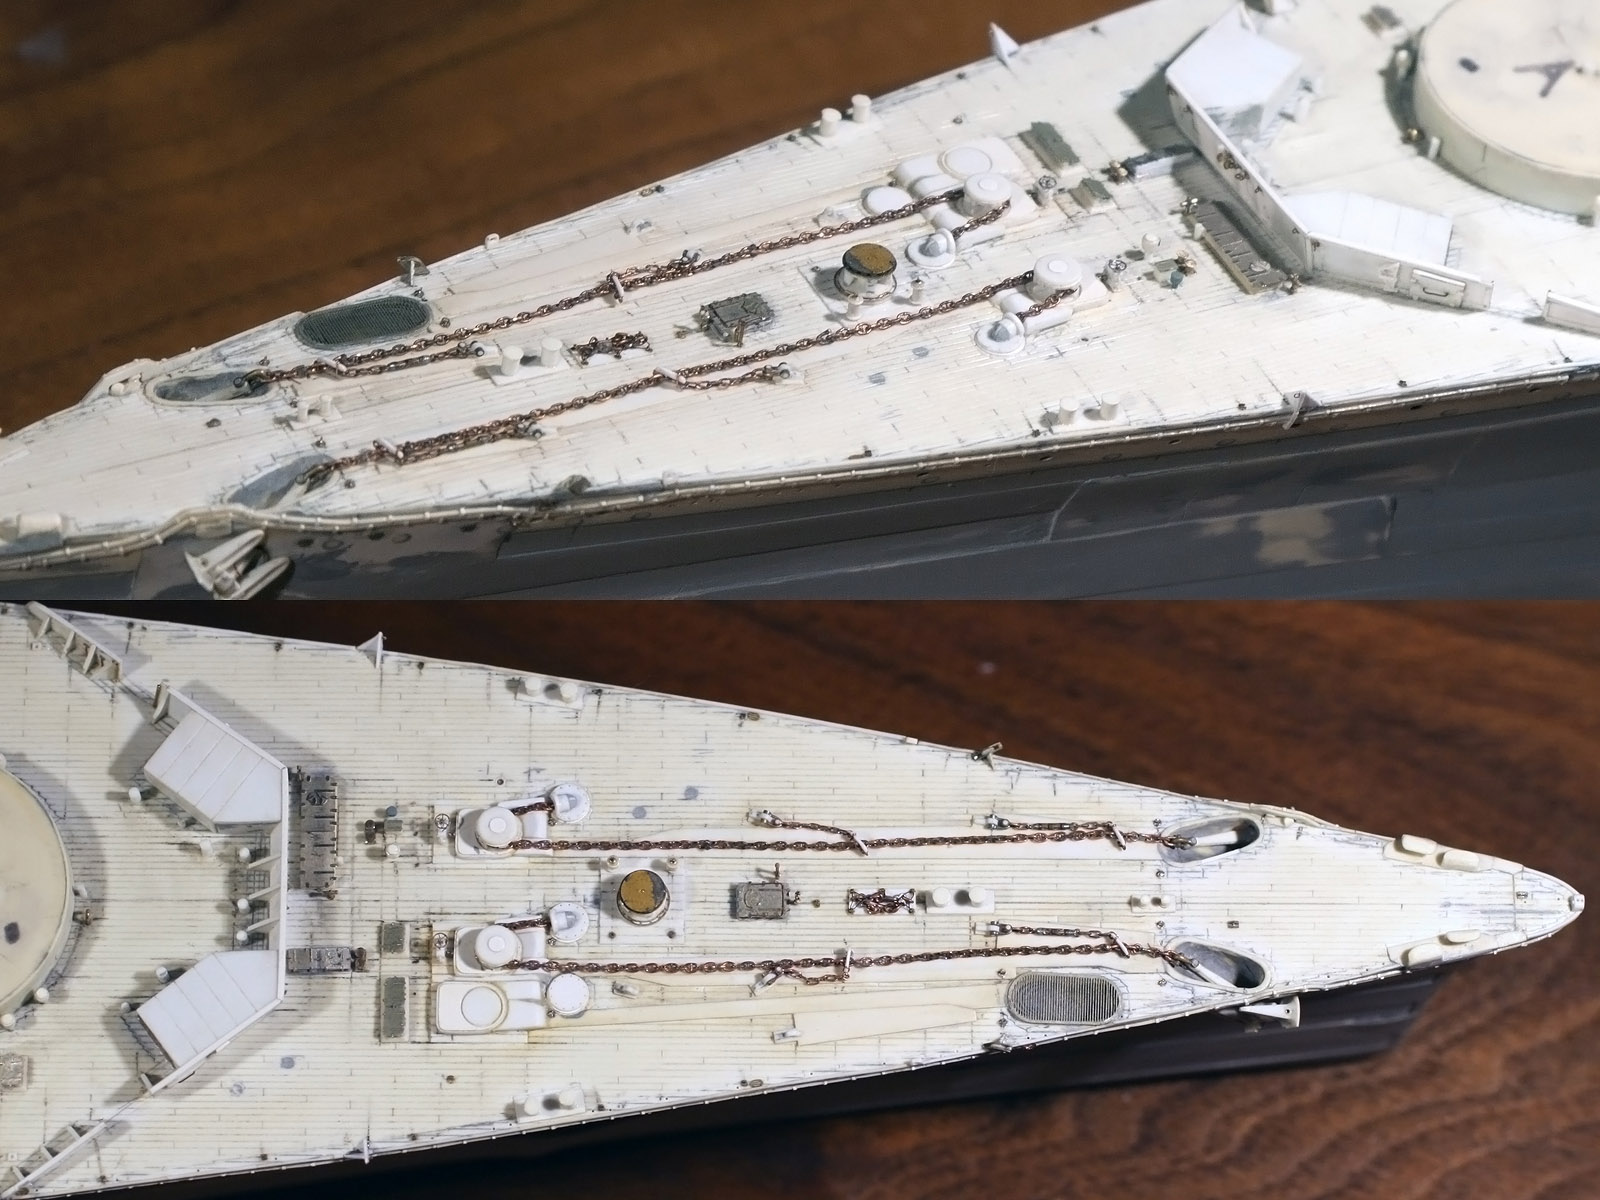
And here is the entire fo’c’sle. After the chains and capstans were replaced a few lifting eyes were added that are scattered around the deck. The cable holder brake handles were reproduced as well as a pair of staghorn bollards near the torpedo loading hatch (the wide hatch in front of the breakwater. A few hatches, capstan and support rollers are not yet fixed for ease of painting. One thing I do not really like is that the skylights on front of the breakwater should have a bit more distance between them; ah well.