With the soldering going so well I decided to solder on a bit more and had some parts redesigned and etched.
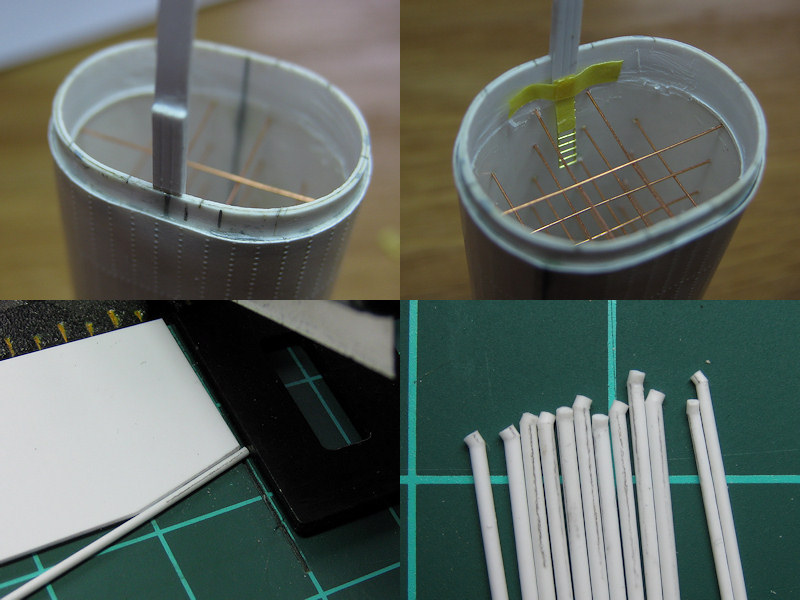
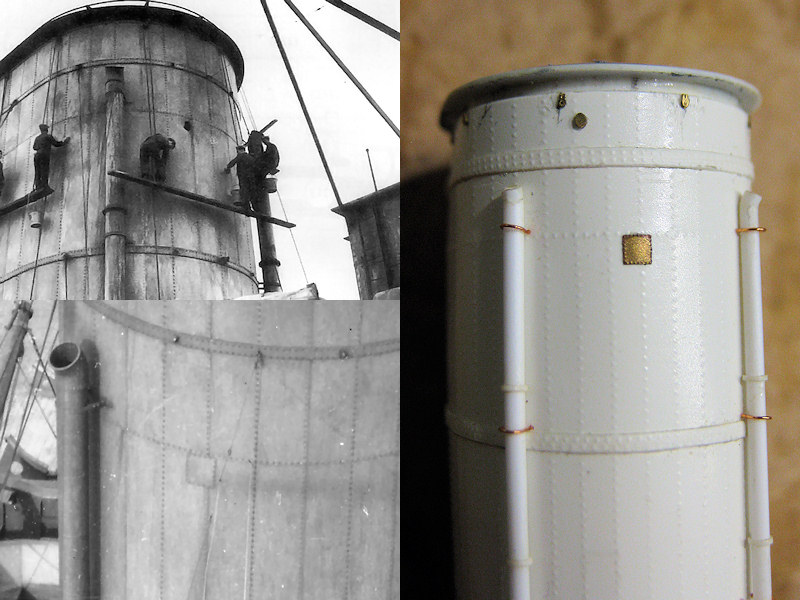
Some minor detail was added first. The two ladders on the inside of the funnel are placed with a jig so that the gantry will link up to it nicely. The ladder is by Aber, one of the few commercial products I have used (I’ll probably use my own ladders in the future). The steam pipes cluttered around the funnel are made from rod; drilled in, chopped up to give it that knuckle on the end, and fixed with brass wire. That is, I didn’t glue the pipes to the wire yet to avoid handling damage in that area.
Note that there is a bit of damage on the aft funnel that was later patched up; a nice piece of detail to add. The top left image also shows the typical Royal Navy approach to painting the ship; they do not use the foot rails found on axis battleships with a series of pulleys and planks to stand on. It doesn’t seem very safe but it does save you building an awful lot of these foot rails. The pulleys are etched parts, folded once.
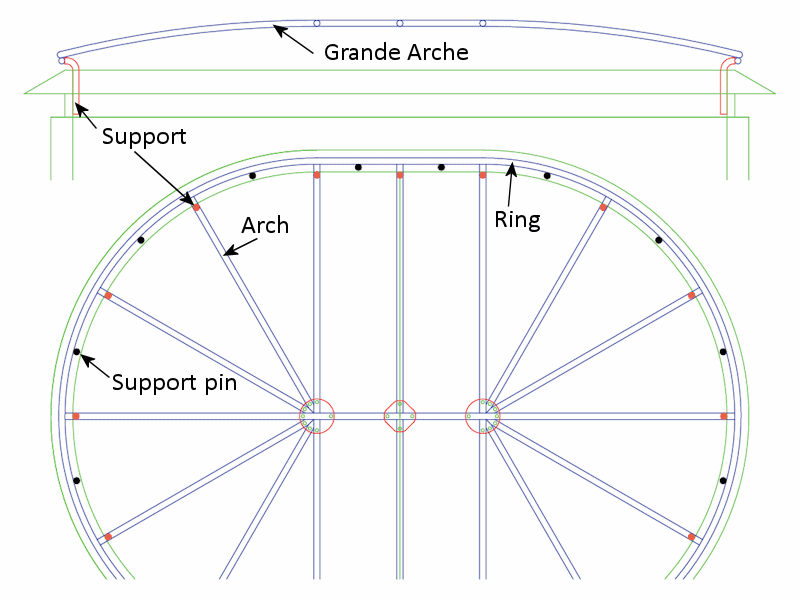
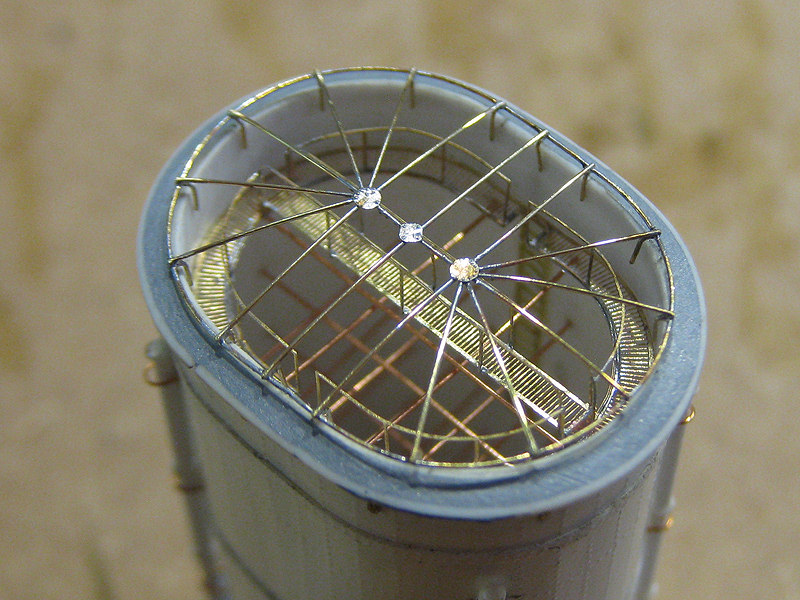
Here’s a sketch of the funnel cage. The crew could access the funnel from below, climb to the top and fix an awning to the cage (but usually did so only when the boilers were out). I made this small drawing in Autocad of the funnel cage with a series of 0.2mm holes for the supports of the cage and for a few pins to hold the cage in place. A ring goes around the funnel cap supporting a series of arches. One large grande arche is on the ship center line. I decided to make a drilling template for the supports and support pins.
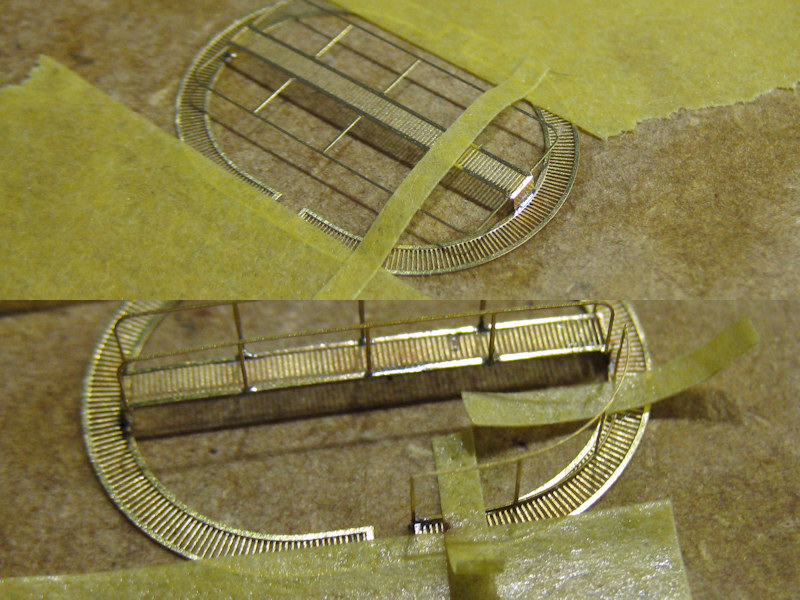
The inside of the funnel isn’t as perfect as I’d hoped and deformed a bit with all these layers of plastic going around it. Perhaps all these brass wires in the inside are a bit too taut. I already botched up fitting several well-executed gantries so I came up with a disposable fitting template to check the goodness of fit; should have come up with that earlier!
The soldering of the gantry itself was slightly tricky and I had to tape the parts down at every step. I added the solder like I’d normally add CA; a few spots to fix the part, with a line of solder when it’s more or less in place.
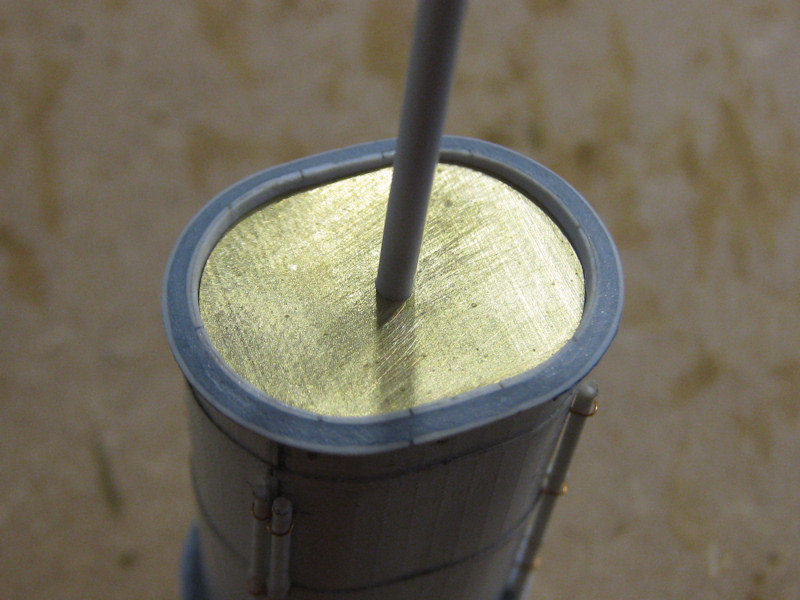
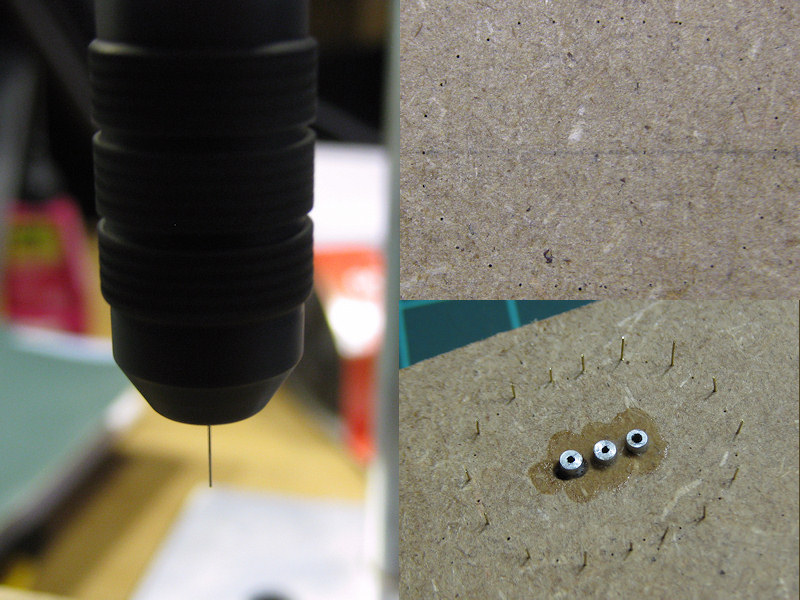
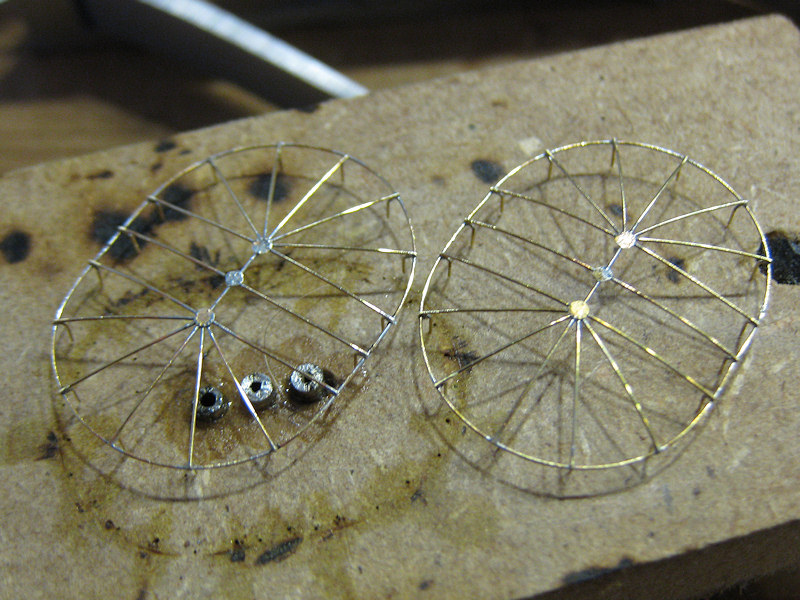
Now the template for the cage. I bought a pin chuck to hold the 0.2mm drills. When I put the pin chuck in the Proxxon chuck (Röhm actually) and dutifully fixed the chuck with the key at all three positions as my tool shop ordered me to do, the pin chuck was not centered correctly; I really had to try, try and try again until it was finally worked. I even bought a new chuck so that I now have a nicely centered chuck/pin chuck combination never to be separated. I made a picture of the spinning drill as proof it finally worked. I started with the drill protruding only a few mms from the chuck but the drill will usually walk away slightly—drilling off center—and the drill will break when the chuck is near the work piece; I lost three drills before I figured this out. So, I finally had the drill sticking about 1 cm or so from the chuck so that it could flex. The result is shown at right after drilling and with the positioning pins. The tubes at the center are supports for the arcs of the cage, made from aluminum so that the brass wire won’t be soldered to them.
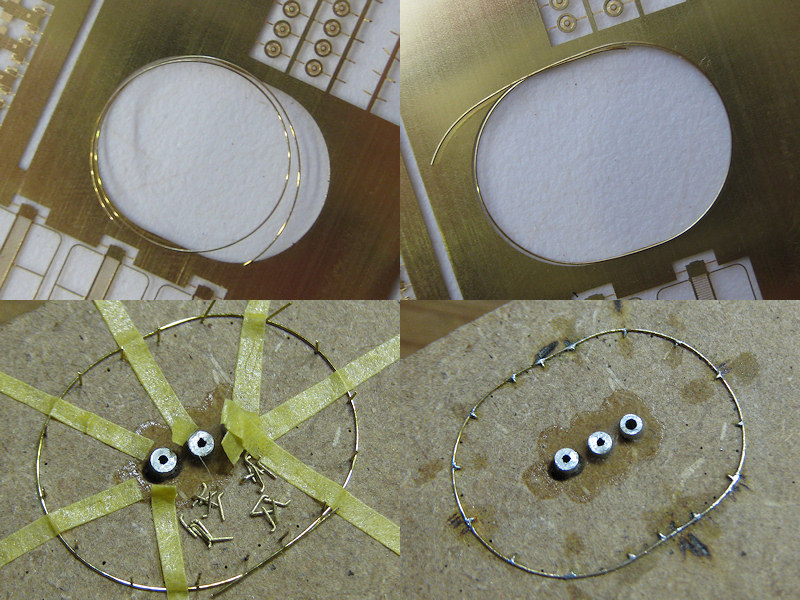
I had some room to spare on my last etch so I added a folding template for the ring of the cage; the brass was far too stiff to use this template but it did work to check the shape. I started by rolling the handle of my X-acto knife over a 0.2mm brass wire until the diameter was correct. With some pressure from a pair of pliers I added the parallel center until the shape was more or less right. The wire was transferred to the jig, held in place by tape and the supports were added one by one. I started opposite where the ends of the ring meet and cut the ring to size only when nearly all supports were in place. The positioning pins could then be removed.
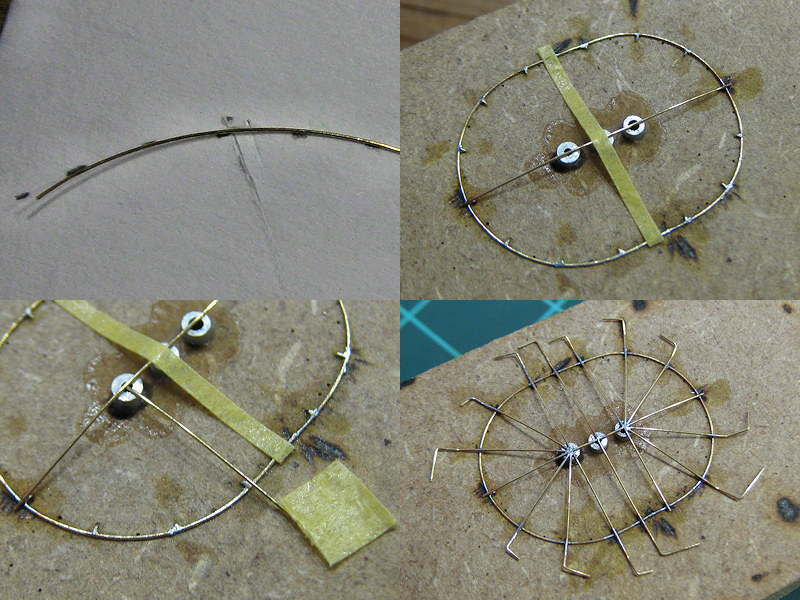
The arcs were bent into shape and checked against a high-tech drawing. The grande arche was added first, followed by the other arches. Note that the ends of each arc have a 90-degree bend; this allowed me to temporarily tape the arc to the jig and keep the direction of the arc upwards; otherwise it will just fall over all the time. I fixed the end of a single arch to the grande arch, fix the arch to the ring, and reapply to both ends in succession. By doing this, there is no stress in the solder and when I apply heat to the center they do not change position (much).
Afterwards three etched parts were added on top of the intersections of all the arcs. The difficulty was not so much avoiding the desoldering of all arcs but aligning the etchings themselves. The cage could then be lifted from the jig. One cage was damaged beyond repair at this phase. One cage took between five and six hours to make; this time was mainly spent looking through the Optivisor and handling the parts with tweezers and the soldering iron until the alignment was to my satisfaction (which is never, naturally).
These funnels took more than a fair amount of planning and experimentation but now have a level of detail that I would not have thought possible a few years ago (cage and gantry are not fixed yet in this picture). The soldering allows for much better and clearer work than using super glue and it is much easier to correct.


