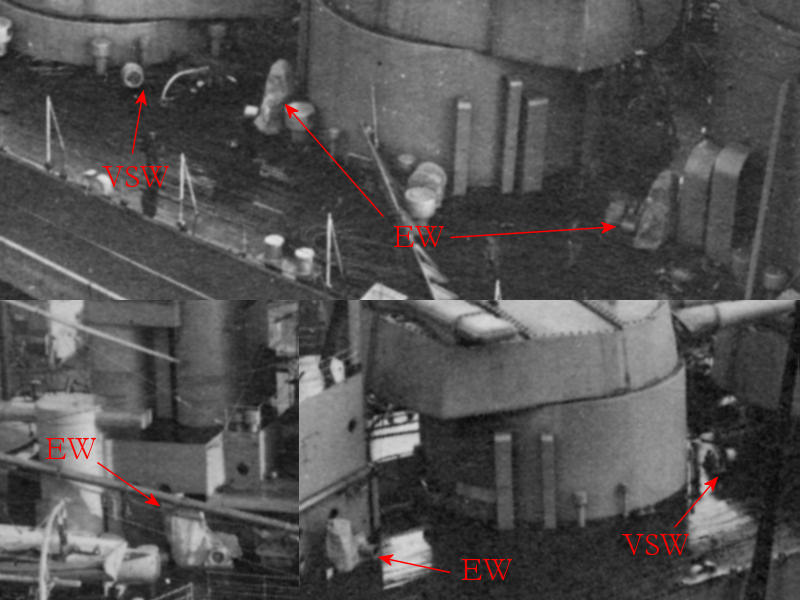
Two types if winches were present, the variable speed winch (VSM) and the electric winch (EW). These winches are scattered mainly around the barbettes and the forward boat deck area for the boat derricks.
The above image shows HMS Hood shortly after her construction with both types of winch clearly visible. There are two VSWs between the forward and aft turret pairs plus two more on the starboard quarterdeck . Two EWs are placed at B-barbette, two on either side on the conning tower, two near the boat derricks, and two against the quarterdeck bulkhead. The winches near the turrets aren’t positioned symmetrically, so not all winches are shown on the above photograph.
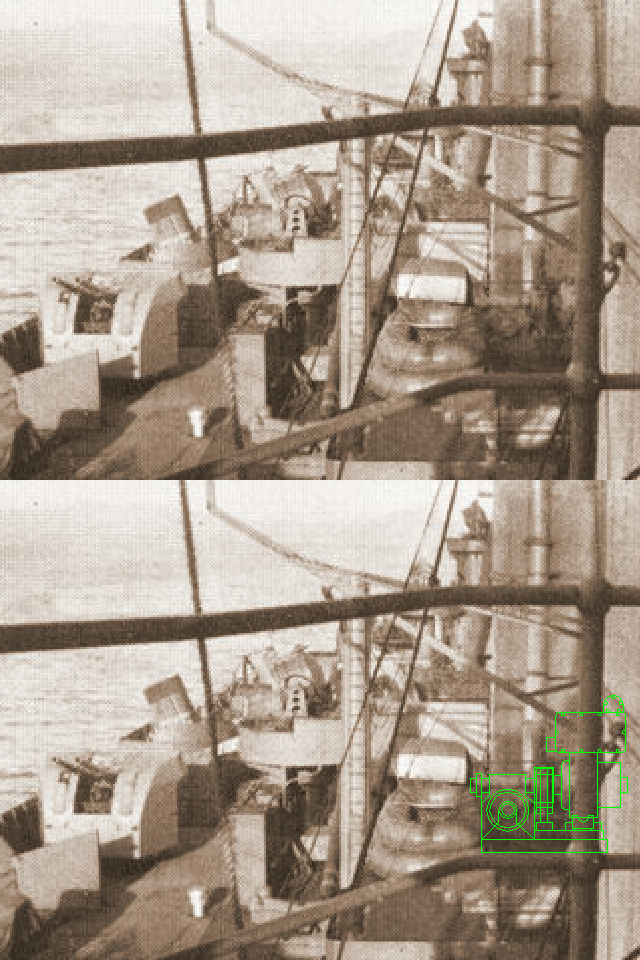
If you look very closely, you’ll notice that the rigging of the boat cranes was changes at the end of Hoods career. Two winches were placed on the structure between the funnels as indicated above (reconstructed winch shown). All (most?) references indicate these winches are the same winches as previously placed on deck level but changed position. But then there would be no winch to drive the derrick, only the hook, and the rigging scheme no longer makes sense: these have to be new winches to operate the derricks. Images showing both in a single shot weren’t found.
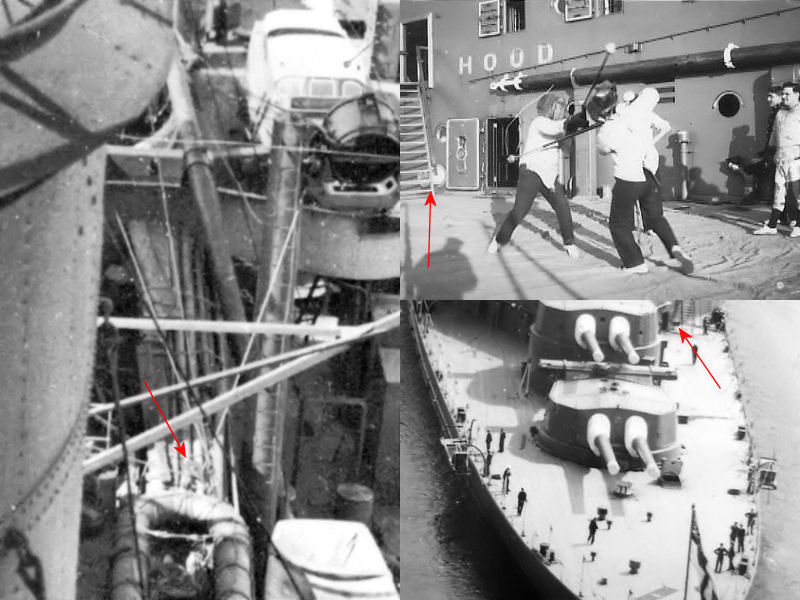
The evidence is really staring you in the face if you look closely at the above photograph from the official HMS Hood site of these two sailors posing in front of the boat derrick’s EW. The 16″dinghy stowed to the bulkhead and the 25″ fast motor boat indicate this picture was taken after the winches were placed between the funnels and yet a winch remains visible. So, the number of EWs was increased to ten, though only eight models are required.
The left half of the image shows how the rigging of the boat derricks was lead to these new winches. The right half of the image shows that the two EWs on the quarterdeck were later moved inside and only the drums remain visible. No small wonder, considering that Hoods quarterdeck was always flooded when underway. Having the winches inside isn’t new, all the Queen Elizabeth battleships have their winches inside.
After having done a thorough head counter the two types of winches were traced using a CAD program. Some perspective is always present but they should be reasonably accurate. The VSWs still remain a bit of a guess though.
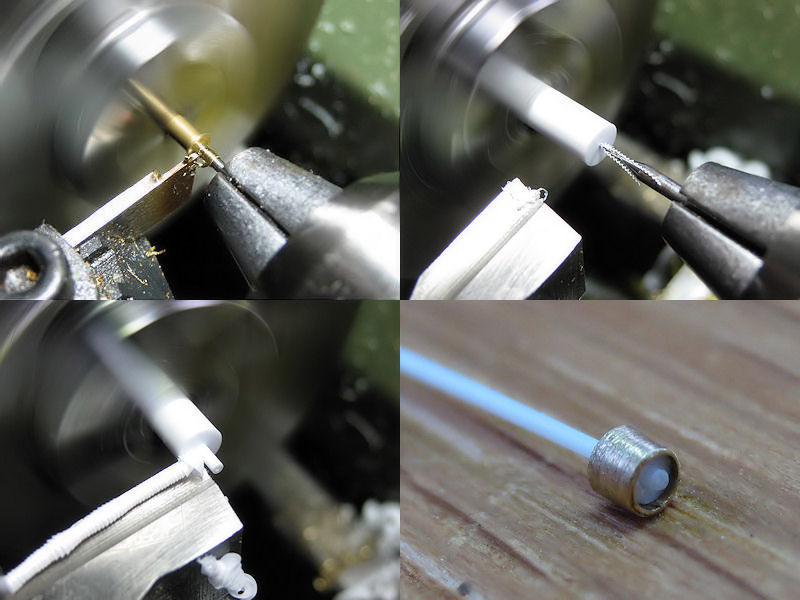
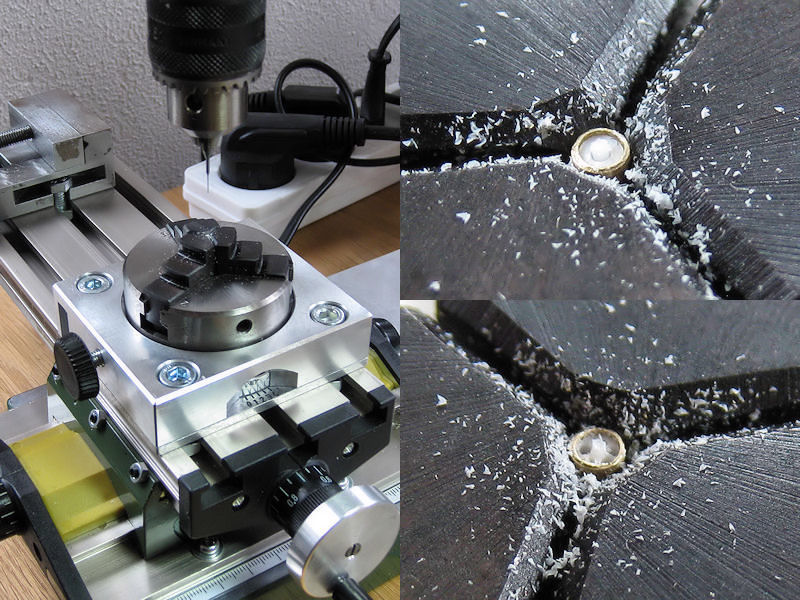
The main difficulty in making the winches are the drums. I spent many hours trying the get the lathe to do what I wanted and made many failed attempts. The drum was made from brass stock. made flush and the center was marked. A 1.0mm hole was drilled in next. The lathe was set to make a tube with a wall thickness of 0.1mm. The lathe was set at its maximum rpm.
The tube was parted from the stock brass using a parting tool bought from MicroMark and ground to a 0.4mm width as visible top left. Note I use the drill to support to tube while parting. Although I broke a few drills while experimenting (parting tool not set at the correct height), there really was no way to get a good tube without supporting it, otherwise the lathe tears the tube from the rod. This exercise was repeated for the styrene insert, drilled in with a 0.4mm drill, cut to size and fitted with stock styrene rod.
The next part proved to be very troublesome: I wanted to have 5 holes in the drum, spaced out at 72 degrees. I initially glued the brass tube to stock styrene by Plastruct, but small deviations in its roundness made this a futile effort. The rod was simply not accurate enough and I spent many hours and breaking many drills getting the part right. When using rod made to size with the lathe, I had no such problems and the five holes could be drilled in. I set the drill press to a high rpm and mounted the drum on the divider (Proxxon). You have to be really careful here, as the drill can occasionally push the styrene our and you can also crush the drum with ease in the chuck. Of course, this happened a few times.
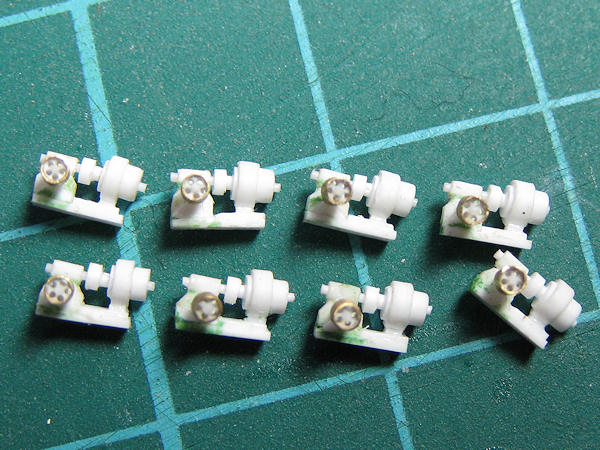
Eight drums are now sitting comfortably in the EWs. The winches are built from mainly lathed parts.
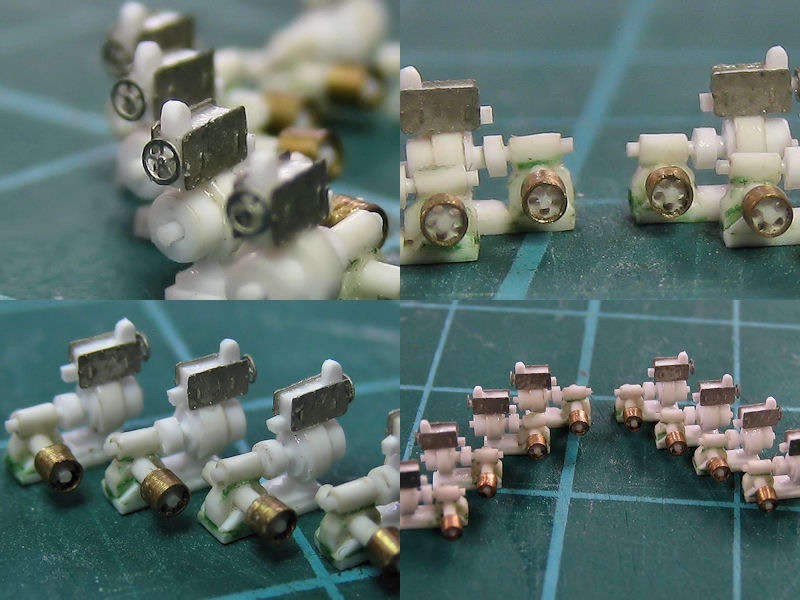
Here you can see the completed EWs, with the etched parts for the control box and the some hand wheels. A nice exercise in getting to know the lathe better.


