Category: Miscelaneous

Cabinet


Warning: Attempt to read property "post_type" on null in /srv/users/ontheslipway/apps/ontheslipway/public/wp-includes/post.php on line 6479

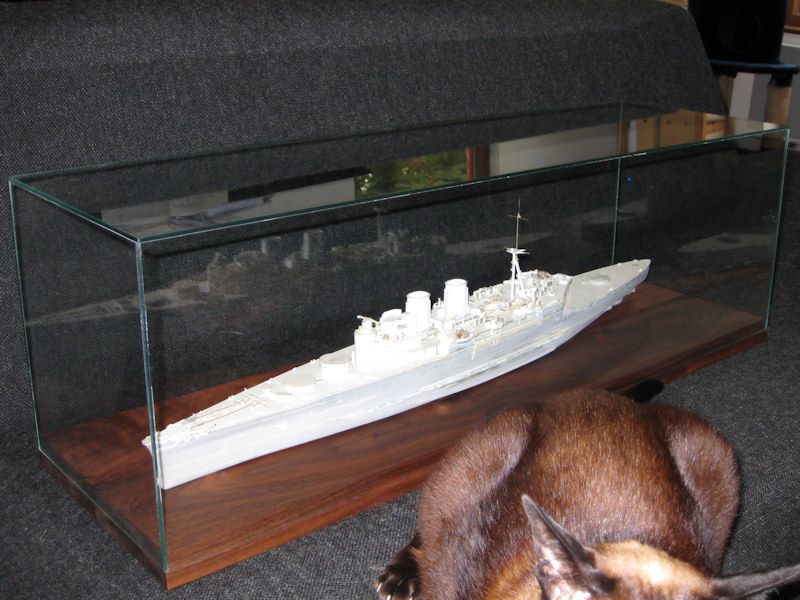
Now, that speaker building project I was talking about earlier was a good exercise for building a presentation cabinet. Damage to models is rare on shows but I get incredibly nervous when people are shaking hands above my model; even a minor hit can mean irreparable damage. Our local IPMS SIG Warships leader builds his own glass cases and blackmailed me to come to a few shows in exchange for a glass cabinet built at cost. Today I made a wooden base for the model using some left-over planks from my bookcase. It should protect the model against shows, transportation, and dust.

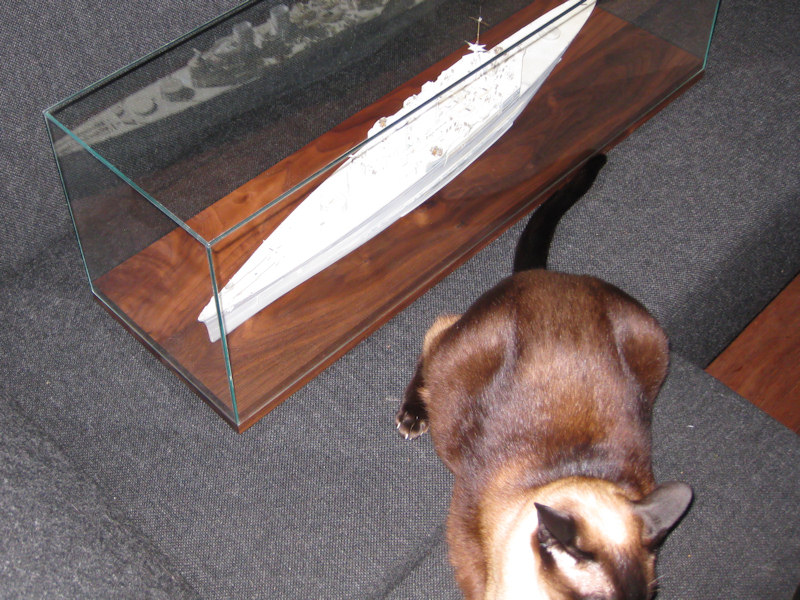
The plank was milled to size and I cut a small ledge for the glass case. The glass is 3.0mm thick and has a bit of room to manoeuver (also in case the wood works). Although my cats aren’t an enemy of my hobby—they haven’t caused any damage to my model—today I just couldn’t get the tiny bastard out of the frame; he’d bounce back immediately after being thrown a great distance across the living room.

The model is bolted to the plank by three nuts and bolts. Recall that I started with the WEM resin hull that I fitted with fixing bolts before adding new decks. The glass case is 80 cm wide so that it fits in most book cases (I refuse to admit it is made to fit an Ikea Ivar bookcase) and is 25 cm wide and high. That’s a bit wider than strictly required, but this size will fit my next project too. A seascape will be added once I’ve thoroughly exercised making seascapes.

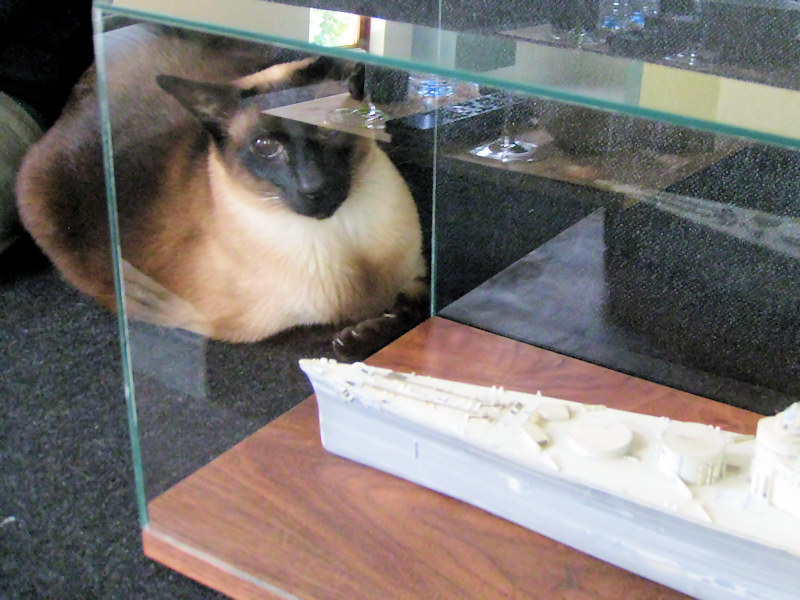
Yes, I assure you, cat, we are quite safe from your friends here.

Camouflage of HMSs Queen Elizabeth, Valiant, Renown, 1944

I was watching the Imperial War Museum’s DVD “The Royal Navy at War; British Pacific & East Indies Fleets”.  The British fleet was accompanied by the USS Saratoga in 1944 from which some color footage was shot. HMS Queen Elizabeth, HMS Valiant, and HMS Renown are depicted in their well-known Admiralty Standard Camouflage Scheme A—G45 warm light grey overall and a B20 medium blue panel on the hull—and I noticed that the main turrets and non-vertical surfaces of the secondary armament are in the same tone of blue. You’ll notice that these turrets appear darker on black & white footage as well, unlike the camouflage of other cruisers and battleships in the same scheme.

HMS Queen Elizabeth.

HMS Valiant. Note that HMS Valiant main mast is a pole mast and that HMS Queen Elizabeth has a tripod mast.

HMS Renown

Proxxon Precission Lathe

After having bought the drill press, I bought a small lathe by Proxxon. I owned an older Emco Compact 8 for a while but only used it on occasion as it needed more space to operate than I had. I lost a few parts moving it to my new house and the live center was completely stuck in the tail stock. I damaged the lathe while trying to repair it (how typical) and decided I wanted a smaller, newer, and more compact lathe. Easy access to spare parts is a diminishing feature of the Elco, let alone access to affordable spare parts. Similar to their drill presses, Proxxon offers two lathes, the PD230/E (small) and the PD400 (large), but the differences between them are large enough to look more closely before deciding. The PD400 has twice the distance between the centers, weighs 45 kg, and has a spindle bore of 20.5 mm while the PD230 weights only 10 kg, but has a smaller spindle bore of 10.5 mm. This meets my needs perfectly for a small tool that I can easily store in my hobby room. The PD230 has the same range as accessories as the PD400—including milling and drilling equipment—(except a quick-change holder for a parting tool and the traversing steady). A disadvantage of the Proxxon lathes is that they each come with their own chucks, clamps and collets, and share few parts among them including the mill/drill upgrade. This shouldn’t be a problem as I do not want to have two lathes now, but the PD400 can also be bought as a CNC version. It is too expensive for me now (listed at €4400. The other list prices are €930 for the smaller and €2300 for the larger lathe) but might be a nice option in the future requiring me to possibly buy all these items once more. The lower cost, weight, and footprint of the PD230 made it the logical choice for now. I purchased the lathe on Ebay for €699 from a German reseller with an Ebay-nick of Briggebaecker.
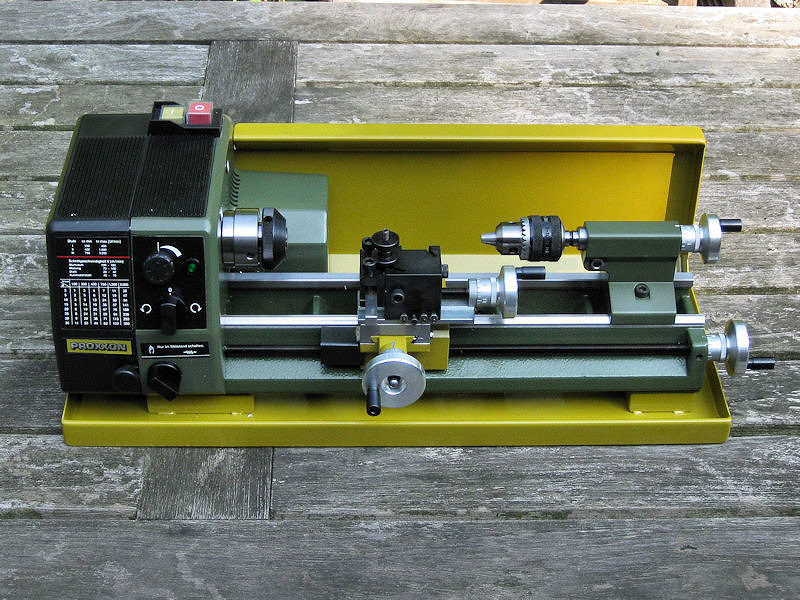
Here’s the lathe including the “Splash guard and chip collecting tray” (24006). I decided to have a few accessories with the lathe. This first one is a collet set (24042) for better accuracy (centricity) and easy of use . As I intend to use styrene when possible, I want to minimize damage of the styrene of the three-way chuck leading to the part being off-center, but this is a very expensive accessory. However, it will be very easy to use with stock styrene and brass rod and the collets come in a range of 2.0, 2.5, 3.0, 4.0, 5.0, 6.0, 8.0, and 10.0 mm. (postscript July 2010: I never use the collet set. The three-jay chuck is just fine) The second accessory is a gear chuck (24020) for drilling. I expect this will really be an improvement over using tubing with a given inner diameter. Of course, without the cutters the lathe won’t work so I also threw in a set of cutters (24530). The last accessory is a quick-change holder for the easy change of cutters (24022). I’m not too sure I’ll be using it often but I’ve seen machinists use them and they looked very convenient as you do not need thin metal sheet to change the height of the tool. This part is fitted on the PD400 by default, but is again a different type and parts are not interchangeable. (postscript July 2010: the quick-change holder is a necessity, not an option!). The PD230 also doesn’t have the parting-tool holder and cutter for its quick-change holder according to the brochure of Proxxon. The last item is a center turning attachment (24070) which might be nice for longer parts.

The lathe comes with a a change gear set for wire cutting (left and right handed), live center (MT-1), three-way chuck and a set of hex keys, so no need to worry about different types of screws here. The PD230 can be used for thread cutting although I do not foresee I will be using that option. The lead screw, cross and top slide, tail stock, and tail stock sleeve position can all be fixed, though not too tight. The tail stock sleeve is fixed by a bolt and not by a hex screw. All the functions my old Emco had are present, although the Proxxon has less screws to properly calibrate all positions.
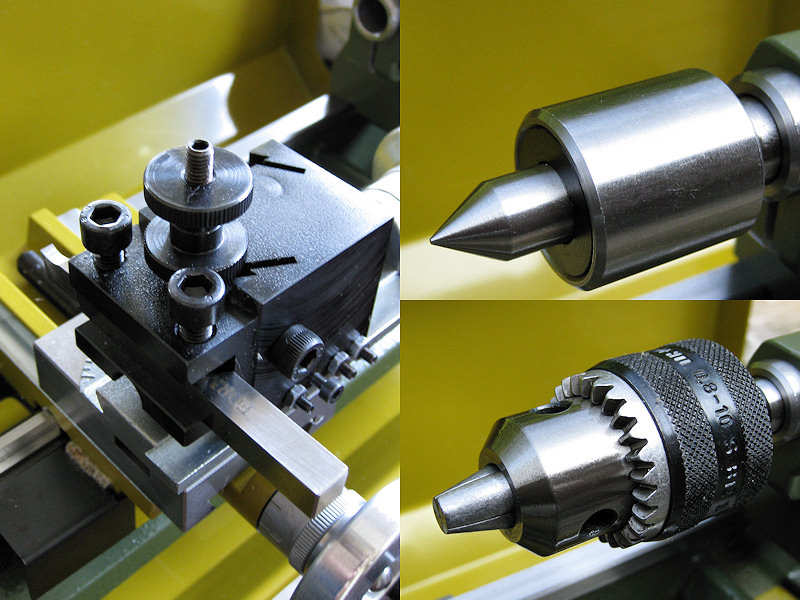
The quick-change holder is seen at left, the live center (included) and gear chuck at right.
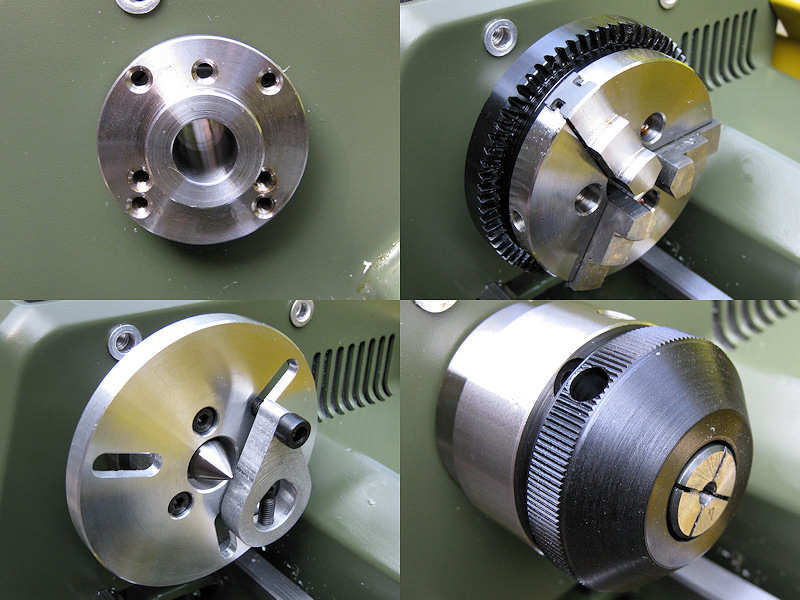
Several items can be attached to the lathe. The top left picture shows both a triple and quadruple array of bolts to fix chucks to the headstock. The three-jaw chuck is shown at right. Proxxon does sell a four-way chuck (24030) but I don’t think I’ll even need it. The bottom-left image shows the center turning attachment. The free-hanging bit on the right is clamped on the work piece which is on its turn mounted on the center. The screw fits in the slot and will rotate the workpiece. Apparently more accurate to use, but also very nice to fix certain parts between the centers. At right the collet chuck is shown. The collet chuck of the Elco automatically pulls out the collet when the chuck is loosened, but not so for the Proxxon. You need to hit it with some stock rod through the spindle bore if the collet won’t come out easily.

I first spent a few hours taking the lathe apart, cleaning up the grease, oiling it, and putting it back together again. I started experimenting with 4.0 mm styrene rod. You have to be careful choosing a low rpm for the parting and drilling, as they quickly melt the styrene. The parting tool by Proxxon is just over 3 mm wide, which is a bit too much for the poor 4 mm rod to handle. I intend to make a very thin parting tool and have Micromark’s cut-off tool holder on order (82753), a small tool that holds a thin cut-off blade. I intend to grind one cut-off blade to a much tinner width and see if that works. Micromark sells many additional extras for the American variant of the Proxxon, called the Microlux minilathe. There are many more accessories for the Microlux than the Proxxon, even a digital readout.

Proxxon Drill Press

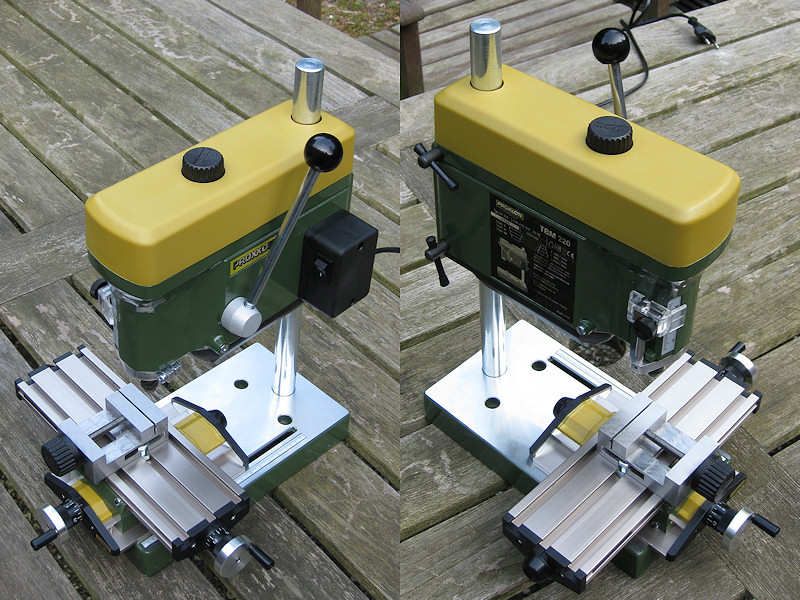
I bought a small drill press by Proxxon. It’s very cute and not so expensive. I previously used a drill press for drilling in the array of holes of the UP launchers. I tried to do this by hand, even drilling through a photo-etched template I had etched. But, no matter what I did, the results didn’t work out. When using a drill press at work, I found at that for such parts even a 0.05 mm misalignment shows with an array of holes, an error much smaller that I can achieve by hand. After all, the distance between the holes was only 0.1 mm. I didn’t have a good use for a drill press until now as I can always postpone certain jobs of the model, but I felt it was about time to buy one. Proxxon sells several, the one type being twice as expensive as the other and I suppose it has other redeeming features as well.

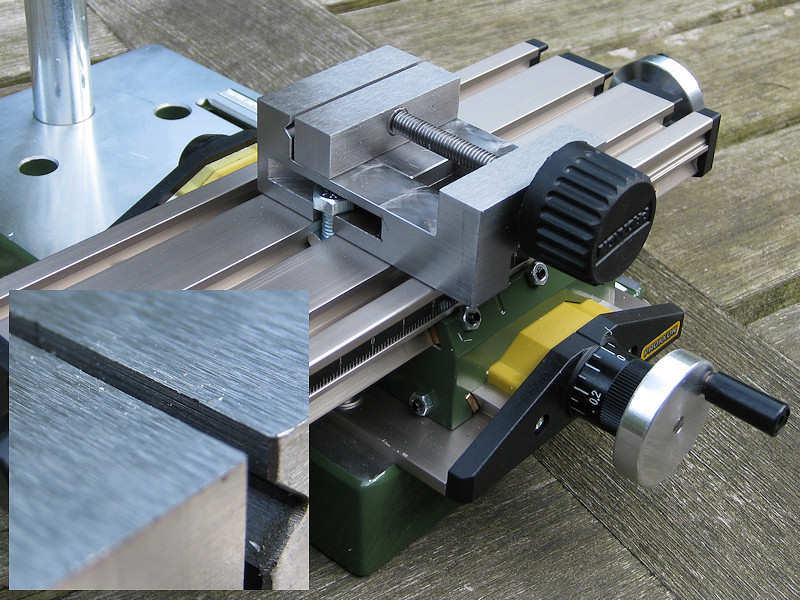
I already have the handheld drill of Proxxon (Micromot 50/E) and a Dremel. Dremel has a much shorter range of tools, mostly hand-held, and they always feel more like toys than tools. Being taken over by Bosch apparently didn’t really help. Their collets are flimsy and flexible, while Proxxon has proper steel collets. Sure, Proxxon is rather childish compared to the tools in the workshop, but those tools are quite expensive for the limited use on my workbench. On most Dutch websites, the Proxxon tools are even sold as ‘modelbuilding’ tools only. But it’s the extra’s of Proxxon that made me buy one. They have a very cheap compound table (27100) and (more importantly) a precision machine vice (24260) for ‘intricate and accurate working’. It’s orthogonal and flat and can hold very thin strips. This is what I intend to use it for, as most other vices are not so flat and orthogonal. Industrial vices that are flat cost far more than the entire combination I just purchased so it sounds like rather a good deal.

The drill press itself is the Proxxon TBM 220 (28128), “competent drilling of micro holes down to even 1/64″ (0.5 mm)”. What? That crude? The drill press uses the Micromot collet system, so that’s a range of six steel collets, the smallest being 1.0 mm and not being able to fix a very small drill at all. I thought I was really clever as my hand-held drill can remove the Micromot adapter and use a normal chuck. Image my surprise that the hand-held tools use a different size of drill-chuck. You can buy the “original German Röhm chuck for drill bits up to 1/4″ (6 mm)” but that one starts (!) at 0.5 mm. Hmm, I wonder who decided using two systems was a great idea.The other thing that was unnerving was the enormous slack in the compound table. Good enough for my modeling and admittedly: it is reasonably cheap at nearly 10% of the cost of a real contour table. I tightened it a bit, but it’s not really machining accuracy. Also, the adjusting screws are tightened themselves by M5 nuts. I don’t know about you, but I have several complete series of wrenches that all start at M6 so I had to use pliers. The first scratch in the paint was present before trying out the drill itself. I never understand why machines are not fitted with one size of screw or bolt but a mix of different sizes of screws and bolts using the slotted (ack!), Phillips, Hex socket and torque screws types ( I can spot 5 types just on the stand of the drill press). Why not use one size of hex slot? Also, the stroke of 30 mm of the drill press is quite small but I knew that when I ordered it. But what I should be saying is that the combination is actually nice value for money at three-hundred Euros. At least I think so, and the entire drill press has a small footprint which also comes in handy on a perpetually crowded modeling table.

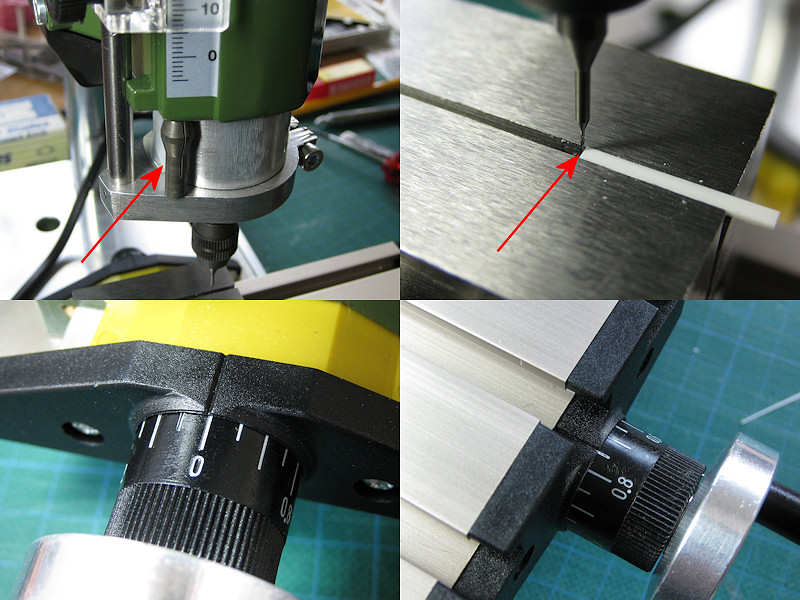
Upon starting to use it, I immediately found another severe deficiency of the Proxxon drill press: you cannot fix it at a vertically-fixed position. I solved this by throwing in a collet I didn’t use at the time to keep the drill in its downward position, shown top left. I then inserted a strip in the vice touching the drill and called that position ‘zero’, corrected for the radius of the drill bit. Ah, the macro-pic bottom left shows it’s not exactly centered.

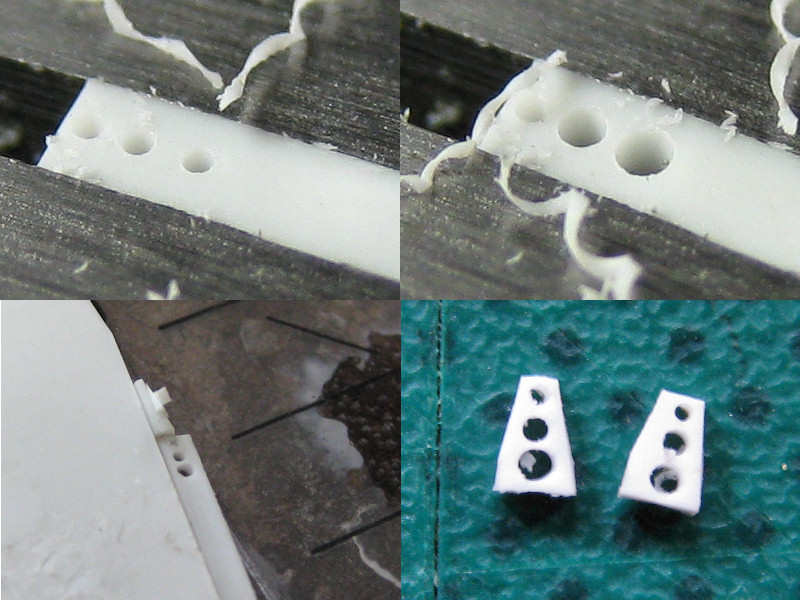
I don’t have that many quality drills laying around as all but the most flexible miniature drills break quite often when using my hand-held pin vice. I found a source of cheap 0.3 mm drills (a second-hand seller, twenty times cheaper than the shop price). I pre-drilled in all the required holes with those drills for this particular part and finished them off using other diameters (0.4 and 0.5 mm) The parts (prior to sanding as my chopper isn’t that consistent) look fine and will be put to good use.

Copyright © 2025 On The Slipway

Theme by Anders NorenUp ↑