Search: “Punch and die ”

We found 7 results for your search.

Making rings with a Punch & Die set, part II

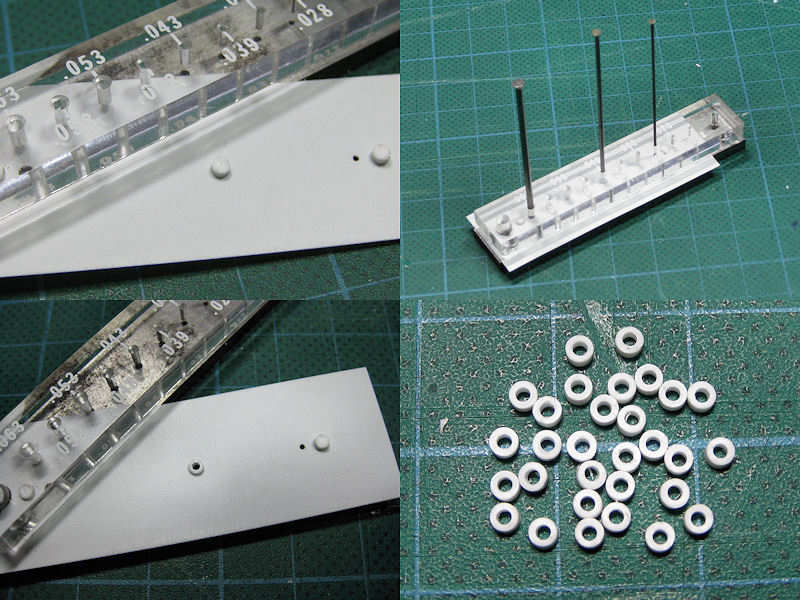
I posted a small tip how to make rings with the punch and die set (here). I made a small refinement that allows for the punching out of holes from rod or disks. For this, I used the Waldron Sub Miniature Punch & Die set (any set will do). I would advice people who want to do scratchbuilding to buy both Waldron sets (or make their own).

1) Take a styrene strip with a hole so that it can swivel around the pin of the set. The strip should be as thin as or thinner than the working material.
2) Place the strip in the set and punch out three holes. One hole is for the working disk, the other two for positioning. Do not remove the punches until all three have been used.
3) We now have a simple template that can be repositioned using the two outer punch holes.
4) Now, drill the center hole to the exact diameter of the working material. I also added to holes at the far ends of the strip and added two disks with the same height as the disk.

5) Insert the disk into the center hole and press it so that it positioned tightly.
6) Position the styrene strip and fix it using  the outer punches for the exact location
7) Gently punch out the center of the disk and remove all punches. Swivel the strip outwards and remove the ring.
8) Make many!

The advantage of this technique is that it works for all combinations of inner (depending on the punch & die set) and outer diameters. You only need to have the exact drill size ready, which is much easier than making sub punches on a lathe as with my previous tip.

Update added 18-01-09

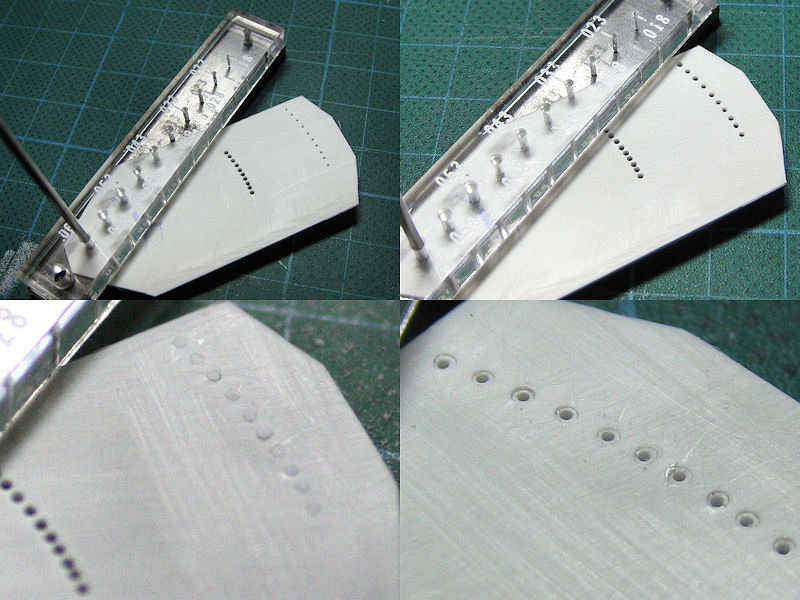
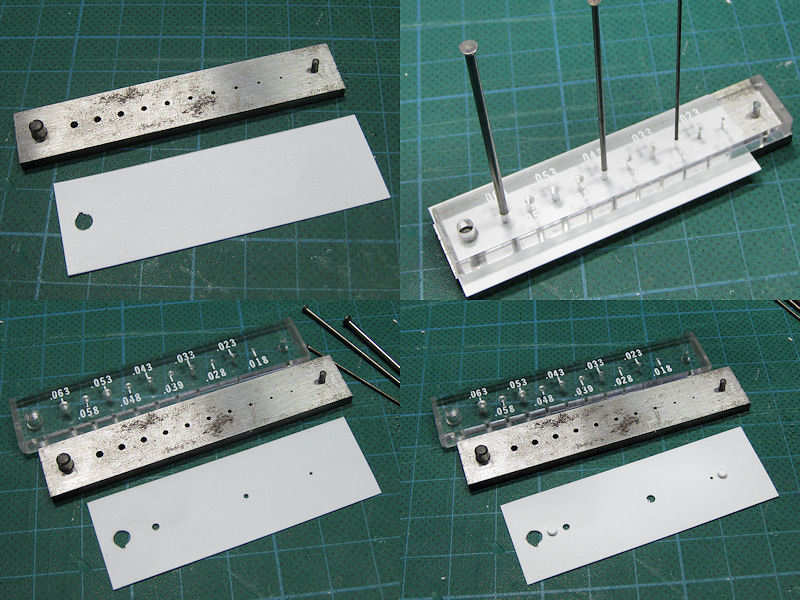
A small refinement was added to this tip. I let the styrene strip swivel around the largest punch. The second punch is taken to set the strip into position with the third punch for the actual punching. The pic shows I use an array of holes. Top left shows the positioning with the smallest punch. At top right the holes are drilled in where the rings can be positioned. Bottom left shows a series of 10 disks in place with the result shown at bottom right. From the close-up is visible that not all rings are concentrically, so you need to throw away some of them. I also marked which side of the mould is up, as reversing it results in all rings being punched off-center.

Drilling with the Punch & Die set

Another small tip with a Punch & Die set. It can be used as an alternative for drilling, which is near impossible for the part below. The problem is always aligning the part with the set so that the punch is properly centered, but that can be easily solved

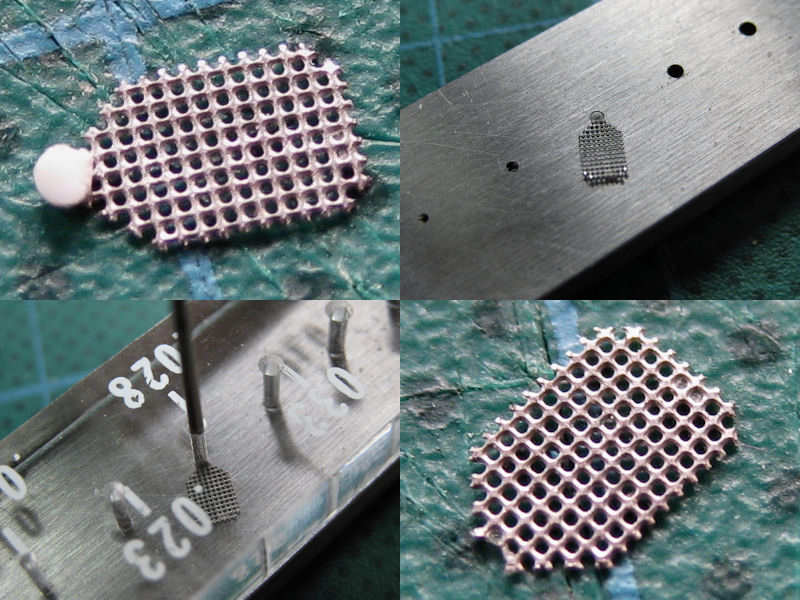
This series of pictures shows the in-progress platform of HMS Hood’s type 279 radar antenna. The platform is very small and is to be fitted to the mast. But as it is very small, it will show when it is off center making proper alignment more important. I use the Punch & Die set to punch off a part leaving the end of the platform circular, making it easier to position and glue to the mast. In stead of making a lot of platforms and keeping the one which worked out best, you can also first glue a disk (or rod) at the exact location where you want to punch out excess material. With styrene parts, you have some time before the glue sets and shift the disk to its proper location (top right). You can then—after the glue has set—use the disk to position the part with respect to the set simply by putting it in the correct hole. Just tap the punch gently and the part is done.

I use this trick quite often as it is easy to use and accurate. Drilling very small parts isn’t always possible, as you don’t have any space to hold them fast and they often tear when using larger drills. Very small parts can be destroyed during the punching as well, but less often than with drilling.

Making rings with a Punch & Die set

If you have a punch & die set—either by Waldron of Historex—you can update the tool so that it can make rings. You need to have access to a lathe, or harass either manufacturer into producing an update set.

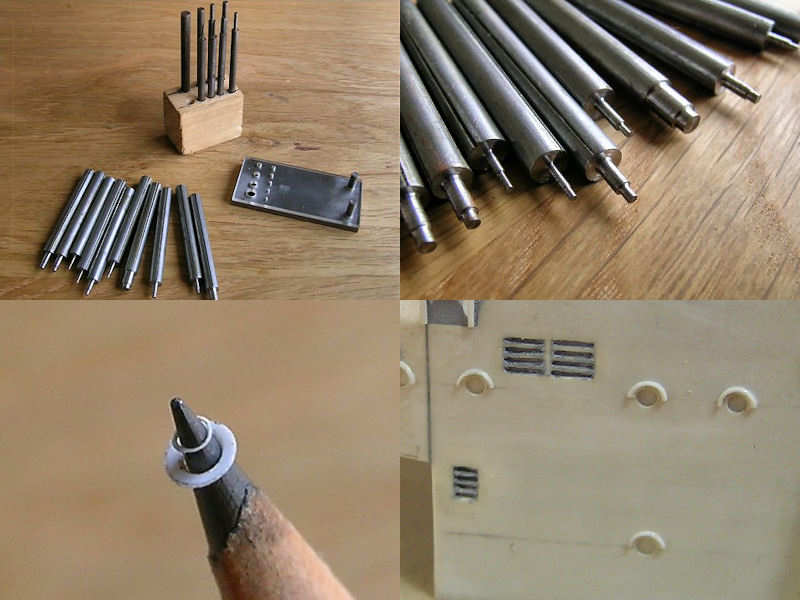
This is the Historex set. It doesn’t have the range of diameters that the Waldron Precission Punch & Die Set has, but I find it a very useful tool nonetheless (I just bought the Waldron set, but haven’t used it yet). The top-right image shows the set of sub-punches I made myself. Use a normal punch to first punch out a disk. Move the plastic sheet to the subsequent hole and use the smaller diameter of the sub-punch to align the part concentrically. Then you can punch out a small ring. The lower-left image shows the range and fineness of such a small ring that you can make. For example, I use the sub-punch set to make rings for eyebrows. Very thin rings often get teared to pieces, sometimes even depending from what side of the plastic sheet you’re working one.

This is a nice trick to make a good tool (albeit very expensive) even better.

Capstans

The capstans are based on the drawings in Ross Watton’s “Anatomy of the Ship: the battleship Warspite”. I used to think this volume didn’t really contain a lot of useful drawings, but that is clearly wrong.

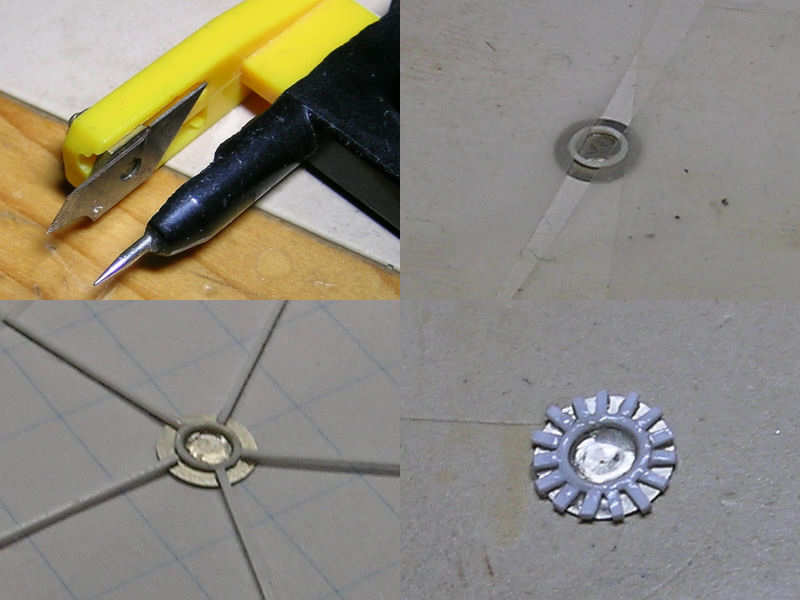
Being rather circular, I relied on my circle cutter by Olfa. That tool is hardly worth throwing away, but can be used with a few modifications. As you can see, I cut away some meat from the black plastic and glued the knife to the bolt that is supposed to keep the knife down. This way you make make smaller circles. The base of the part is the etched top. Spokes were added using the drawing at bottom left, eventually filled out with 15 strips. 

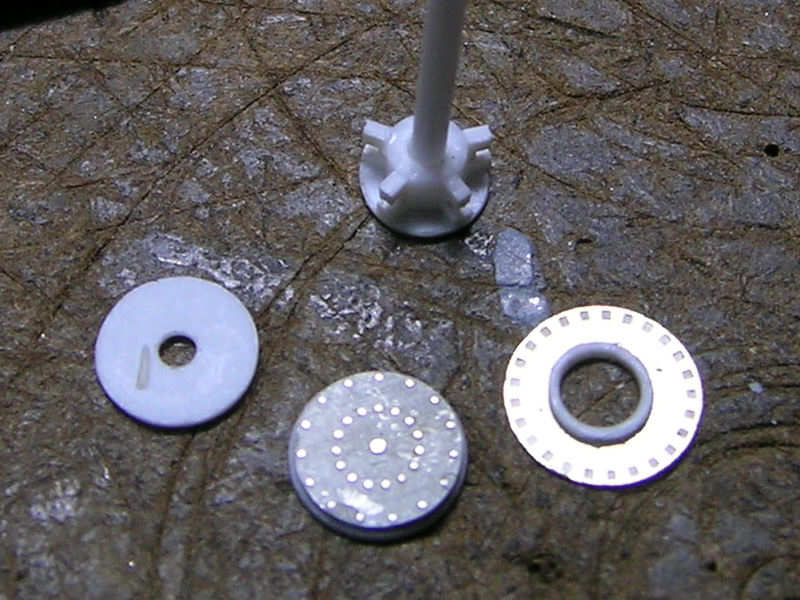
 All the ingredients for the forward capstan. I forgot to etch out the center for the bottom part, using the punch and die set to rectify the situation.

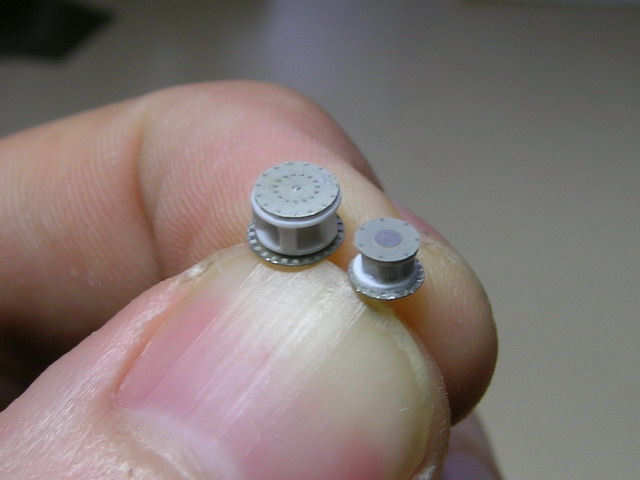
Forward and aft capstan, finished. Perhaps I”ll post better pics later…

Copyright © 2024 On The Slipway

Theme by Anders NorenUp ↑