Author: efoeth

Chopper

The most important tool for my modeling is the chopper. I bought one from NorthWest Short Line a few years back. They say it is “one of the most useful tools ever, for model building, working in wood, or styrene strip materials”. For once, I agree with a manufacturer’s claim. As with many modeling tools, the quality is wanting (to be fair, it is cheap) and I made a few simple modifications. The base plate damages rather quickly, so I added a plastic ruler as a base plate. You can buy these in our local bookshops. I also added some plastic at the base of the lever to correct for the added thickness. I intend to replace it with a more rugged design later, perhaps. Or buy one of their more expensive variants. This chopper wouldn’t function properly without my trusted Mitutoya vernier caliper. They are expensive, but indispensable for accurate modeling. If you want to start with accurate scratchbuilding, consider them your most important tools.

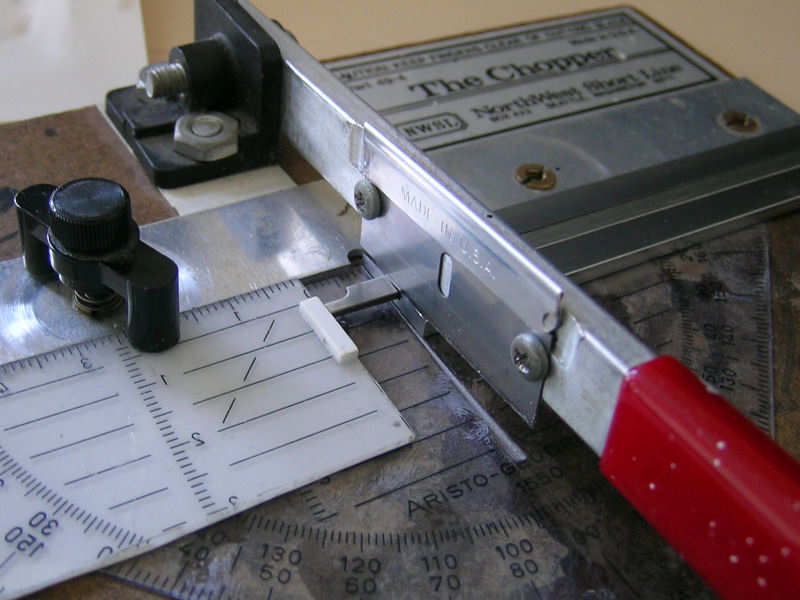
In stead of measuring with the caliper, I use the depth probe to set the chopper. I purposely avoid the calipers with a digital readout. They are more precise, but I think I would spend too much time setting the depth probe to an exact setting! I changed the cutting miter so that it works with the depth probe of the caliper, but this does wear down the razor blade. So, I need to change razor blades frequently but they are inexpensive and come in a box of 100.

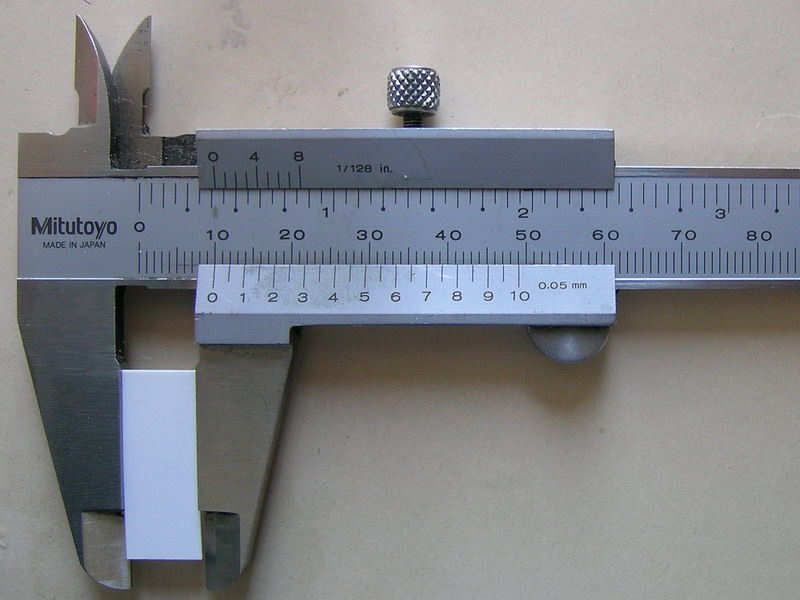
You can measure the result to see if the setting was satisfactory, in this case 10.0mm. Setting the depth probe to a certain depth usually doesn’t result in a cut of the same length, but with some trial and error you can change the setting (+ 0.1mm in my case) that usually gives a good cut. In fact, it is now so easy to set my chopper that I can have accurate and reproducable parts in seconds. If I need to replace a part (and I wrote down its dimensions somewhere), I know it will be of the same dimensions. Somehow I enjoy replacing or adding parts to a subconstruction years later, only to find out that the parts were made with high accuracy. It’s not just important that the part is made accurately to scale, but that the model is built consistently. Although a tenth of a millimeter doesn’t really matter to all but the smallest parts, in my opinion it can be the difference between a very sharp and a rather poor build; stacking a few decks which are all off by a few tenths of a millimeter will show up in the end.

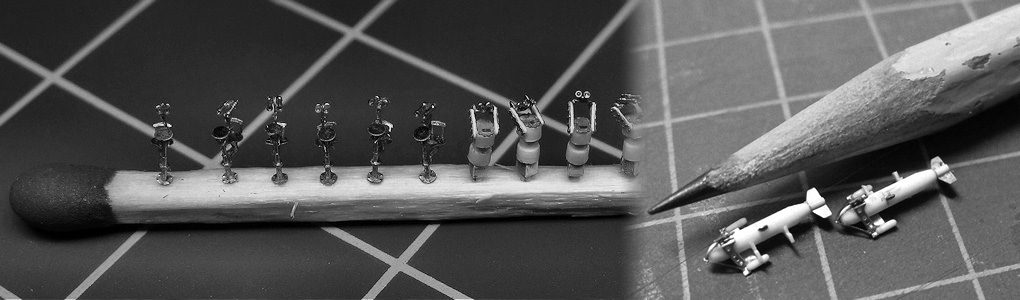
 The chopper itself cannot swivel, but you can make inclined cutting miters. Here you can see a part for one of Hood’s fast motor boats about to be cut to size. When cutting these very small parts, I add a small strip of plastic to the miter so that I can be sure that I reposition the parts consistently (when using inclined miters, the position along the miter influences the part’s final appearance, so you need to fix the part’s position along the miter). Using these cutting miters can require more trial and error with positioning when the dimensions of the part are absolutely critical.  If you need simple parts with a slope, first add the slope and then use to straight miter to cut the part to size. You can also first cut strip to length and then cut a slope to one end but that is usually asking for mistakes.

Vacuum Forming

Vacuum forming is a very simple technique that can produce thin-skinned parts of various forms. I mainly used vacuum-forming for producing the gun shields for the twin 4″ mounts and the hulls of all the boats and launches.

This is it, basically. A small box with a connection for your vacuum cleaner and a series of holes in its top plate. Try keeping the box airtight at the seems. This is my small version with the basic forms of several small hulls awaiting to be copied.

Part two is a small  double frame holding a sheet of plastic. I used a few simple clamps to keep the plastic sheet firmly in place. As you need to heat this part, not using metal might be a good idea.

Heat your oven to some predetermined level, whatever works, and start heating the plastic sheet. Once the plastic gets warm, you’ll notice it will droop down. When you think the plastic is soft enough, fire up the vacuum cleaner, take the plastic from the oven, and thrown the sheet on the vacuum former. The plastic will nicely form around the moulds. This will take some practice and sometimes a mould tips over or the plastic won’t form properly over the mould (folding around edges). This is also the part where I should warm you that you can burn your fingers. I use large plastic sheets, not the more expensive styrene by Evergreen. When an attempt fails, I usually throw the sheet back in the oven and start again. 

 Here is a series of copies of hulls. You still need to trim all the parts to size. The reproducibility is as good as the moulds (they might suffer a bit) but this is a very easy technique to use.

Capstans

The capstans are based on the drawings in Ross Watton’s “Anatomy of the Ship: the battleship Warspite”. I used to think this volume didn’t really contain a lot of useful drawings, but that is clearly wrong.

Being rather circular, I relied on my circle cutter by Olfa. That tool is hardly worth throwing away, but can be used with a few modifications. As you can see, I cut away some meat from the black plastic and glued the knife to the bolt that is supposed to keep the knife down. This way you make make smaller circles. The base of the part is the etched top. Spokes were added using the drawing at bottom left, eventually filled out with 15 strips. 

 All the ingredients for the forward capstan. I forgot to etch out the center for the bottom part, using the punch and die set to rectify the situation.

Forward and aft capstan, finished. Perhaps I”ll post better pics later…

Custom Photoetch Set Part I

As a full scratch build, having a custom photoetch (PE) set isn’t that far fetched. When I started drawing the set, Trumpeter hadn’t released its model and the only available sets were those of Iron Shipwright’s and White Ensign Model’s. Neither set was any good at all. Now several sets are available with the only interesting sets those of White Ensign Models (new set), Lion Roar.

I specifically do not include Gold Medal Models (GMM). Although I have used GMM sets with great enthusiasm in the past (sniff, memories), their sets are still according to the trusted GMM design: a (for current standards) small set with railings (50% of the set), generic parts for some navy (40% of the set) plus a few dedicated parts for the ship in question (10%). I feel this setup is outdated considering the huge PE-sets other manufacturers produce and their new sets sell you the same parts in a reshuffled configuration. The added HMS Hood detail set is “nice”, but not spectacular. The etching quality has always been very good though.

The Lion Roar set is quite impressive when you see all the frets lined up, but on closer inspection the etching design is crude and contains many errors. I feel it is, well, clunky. I think Lion Roar has a long way to go in designing their PE. With the release of the Japanese aircraft carrier flight deck sets, I do think they are improving and have released a truly innovative replacement part. They also released a very nifty HMS Hood main turret in resin which is clearly made superbly, but they managed to completely botch up the rangefinder and the barrel is crap. In short, it’s a great set for a beginner who’s not afraid to spend half their building time knee-deep in superglue, but not really useful for a more demanding HMS Hood modeler.

 I like the White Ensign Model set best, having the most HMS Hood specific parts and add to that the most correct Royal Navy parts. This might have something to do with the fact I sent them my etch set and I recognize a few parts, although they’ll deny it, of course. But, having already admitted to designing my own etch set, the WEM set was a bit late for me to use. Plus, even White Ensign Models didn’t nearly include all the parts I wanted for my own model.

So, custom-design PE sounds like the ideal solution, but it didn’t quite turn out that way. I spent far too much time tinkering with the drawings and adding more detail loosing sight of the final size of the part. All the stairs, each of them designed to fit the exact deck height and width for their specific location, all snapped in half when I tried to bend them. The material isn’t very malleable and some folding lines weren’t etched properly (designed too thin). So, the set is definitely to be etched in a new form hopefully without beginner errors. But on the other hand, some parts turned out fantastically!

 So, this is the entire set. I didn’t do the printing and etching myself, this was done by Saemann-aetztechnik in Germany.

1-10 Assorted stairs
11-12 Deck hatches including inside detail plate
13 Quartedeck deck hatch
14-15 Ammo loading hatches plus inside detail playe
16 Superstructure doors
17 30ft gig detail
18 Quad Vickers ammo locker hatches
19-20 Boiler room uptake vent hatches
21-22 Assorted watertight doors, correct style

A Quad Vickers detail parts
1 base plate
2 Frame
3 Spent casing bins
4 Shields
5 Ammo drums
6 Assorted detail

B Paravane, assorted detail

1 Searchlight covers
2 twin 4″ ammo loading lights
3 Quarterdeck bulkhead hatch, inner
4 Crane pulley
5 Pompom director seats
6 Pompom director, assorted detail
7 Quad Vickers ammo locker hatches
8 32ft cutter detail (unusable)
9 Small reels
10-12 Medium reels
20+22 Large reels
21 Quarterdeck bulkhead vent hatch

1 Degaussing cable (not used)
2 Night lifebuoy rack
3 HACS inside detail
4 HACS, assorted detail (over scale)
5 Pompom ammo locker hatches
6 Funnel grid detail
7 HACS detail
8 Deck hatch awning support

A UP launcher
1 Casing
2 Ammo locker hatches
3 hatch
4 Front/rear casing detail
5 Door
6 Window frame

B Pompom
1 Traversing engine detail
2 Railing
3 Hand wheels
4 Ammo locker frame

1 Commanders hatch main turret
2 Capstan, assorted detail
3 hatch for boat deck
4 Assorted detail
5 Torpedo loading hatch (can you spot the error?)
6 Pompom ammo locker hatches
7 Ammo hoist hatches for the boat deck
8 Large reel
9 Spotting top detail
10 twin 4″ ammo locker hatches
11-13 Single, double, and quadruple skylight hatches
14 Deck locker detail

4″ gun
1 Elevation gear
2 Loading lights
3 handwheels and assorted detail
4&5 Fuze setting device detail
6 Traversing gearbox
7 Awning support
8 Vision port hatches

1 Signal light detail
2 Mushroom vent detail
3 Admiralty ladder handrails
4 Quarterdeck detail
5 Pompom ammo locker hatches
6 Main crane pulleys
7 Clump cat heads
8 Main derrick detail (not used)
9 Ships name
10 Eyelets
11 Rigging details
12 Mast stay detail
13 Assorted stairs
14 Quarterdeck bulkhead hatch
15 Quarterdeck bulkhead hatch, inner
16 Sounding machine
17 Skimming dish, assorted detail
18 Assorted deck hatches

1 Deck locker detail
2 Spotting top detail
3 45ft barge detail
4 45ft barge rudders
5 Rangefinder hatches
6 Boat rudders
7 Assorted deck hatches
8 45ft barge steering wheel and propeller
9 45ft barge railing
10 Voice pipe cabinet hatches
11 Mast detail
12 Assorted stairs
13 Paravane locker hatches
14 Assorted stairs
15 Assorted stairs
16 Cutter details (not used)
17 Fast motor boat propellers
18 Boat rudder details
19 Boat rudders
20 Boat rudder details
21 Boarding ladders, short
22 Boarding ladders, long
23 Boarding ladder handrails
24 Boat detail

1 Assorted seats
2 Random detail
3 Frame for bridge
4 Degaussing cable (not used)
5&6 Mushroom vent detail
7 Assorted hand wheels (4 and 5 spoke)
8 Assorted seats
9 35ft fast motor boat engine hatches
10 35ft fast motor boat stairs
11 Fast motor boat, assorted detail
12 35ft fast motor boat, handrails
13 Too small
14 Assorted handrails
15 25ft fast motor boat, windshields and too small parts
16 Fast motor boats, propeller shafts

Copyright © 2026 On The Slipway

Theme by Anders NorenUp ↑