There are many booms, davits, and derricks scattered around HMS Hood’s decks and superstructure. The rigging and davits are drawn up in excellent detail by John Roberts’ Anatomy of the Ship: HMS Hood and Anatomy of the Ship: HMS Dreadnought. A full list of booms and derricks is given in Maurice Northcott’s HMS Hood: Design & Construction (Ensign Special or Man o’War, same content). Together they have nearly all the information we need for the 1941 version. From the images can be concluded that some booms are tapered, but derricks are not. All booms and derricks are wooden, except the main derrick.
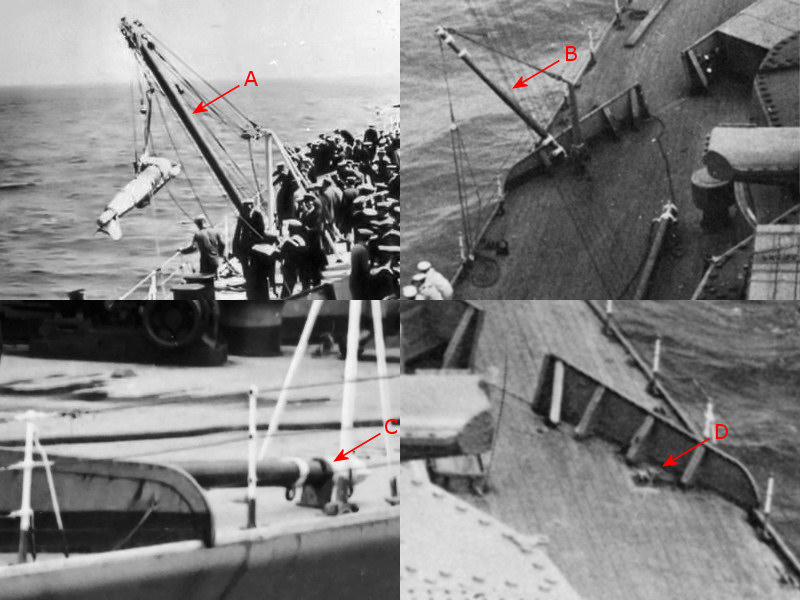
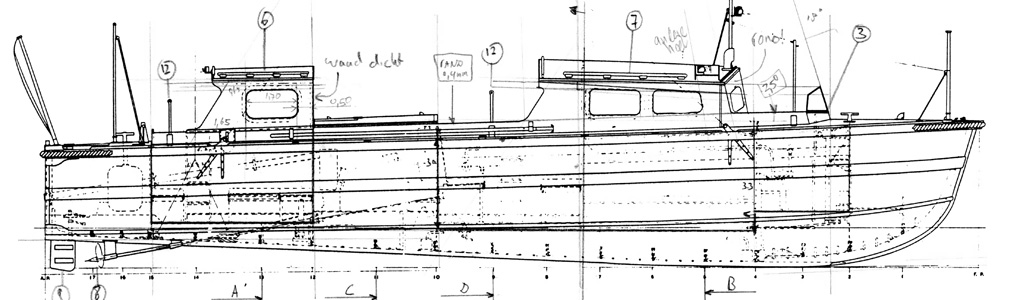
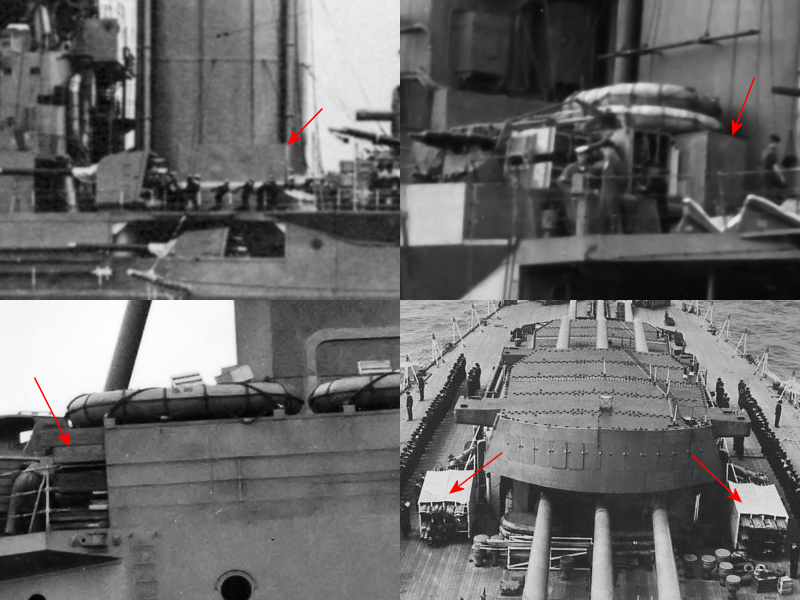
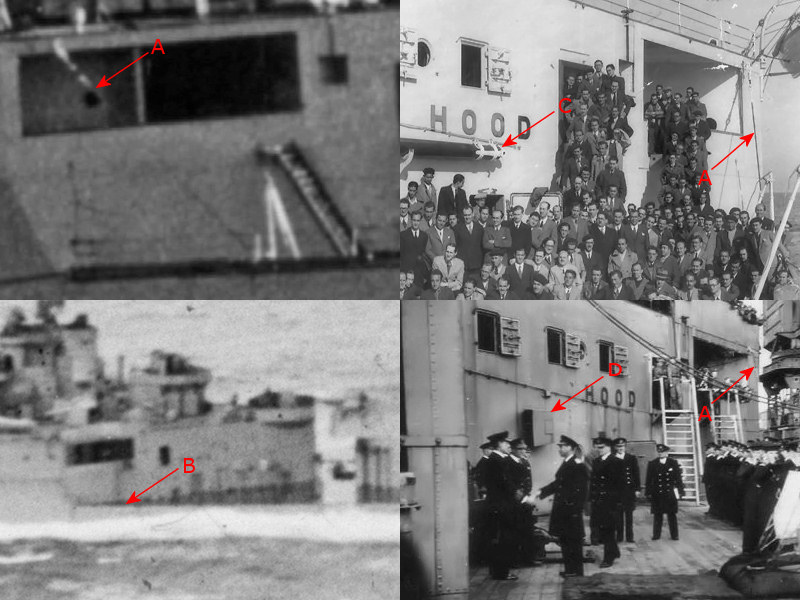
Here you can see a paravane being deployed or recovered (A), but this is not the paravane derrick. This derrick is operated next to A turret, while the actual paravane derricks were stored directly aft of the forward breakwater where a pair of paravanes were stored (B). You rarely see these derrick deployed though and if you want to add them the best option is to either model them lowered (C) or not at all (D); Most images of the forward breakwater show the derricks to be absent. So, if you build the Trumpeter kit you’d best throw these parts away.

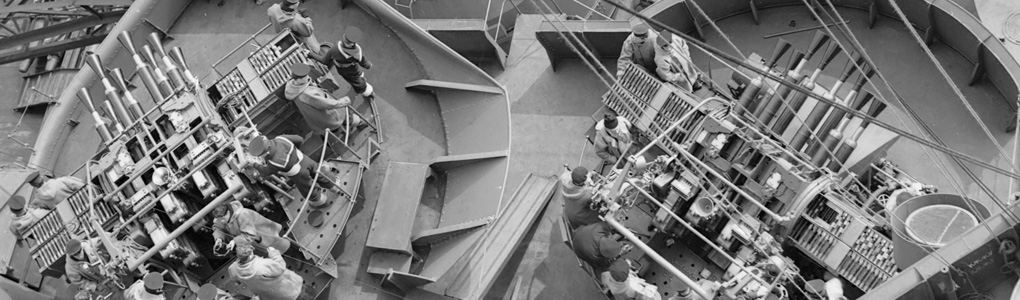
The second largest set of derricks consists of three pairs of 40ft derricks. These derricks were used to load ammunition or hoist boats. When HMS Hood was completed, one set was stored near the bridge, one set was fitted to the smaller cranes on either side of the funnels, one set was stored at the deck side on either side of the main derrick and one set was stored to the quarterdeck (4 pair). For the 1941 version, two pairs of derricks were fitted to the bridge bulkhead, below the smaller sounding booms, while the other two sets remained fitted to the smaller cranes. The quarterdeck derricks were removed.
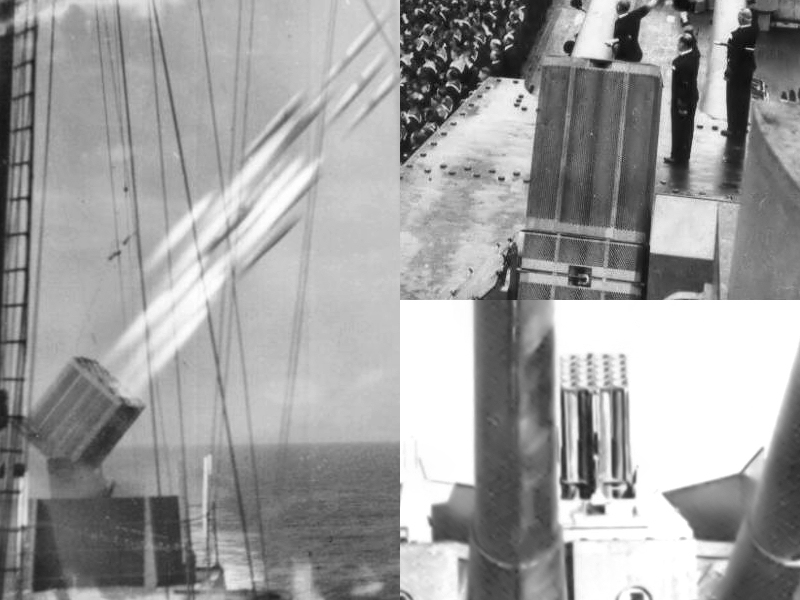
Another set are the 36′ 9″ sounding booms. No resource specifically identifies their location, but two booms of the same length were fitted above the 40ft derricks during the final modification. This indicates that the sounding machines themselves were on board when HMS Hood was sunk. The image shows the sounding boom deployed during outfitting (A). Two sets of booms are fitted for embarking and disembarking. One set of 50ft guest warp booms (A) was fitted to the hull near the bridge and one set of 30ft6in swinging booms was fitted at the quarterdeck bulkhead. These booms were all tapered. Note how all these booms were rigged with a stay and two lines.
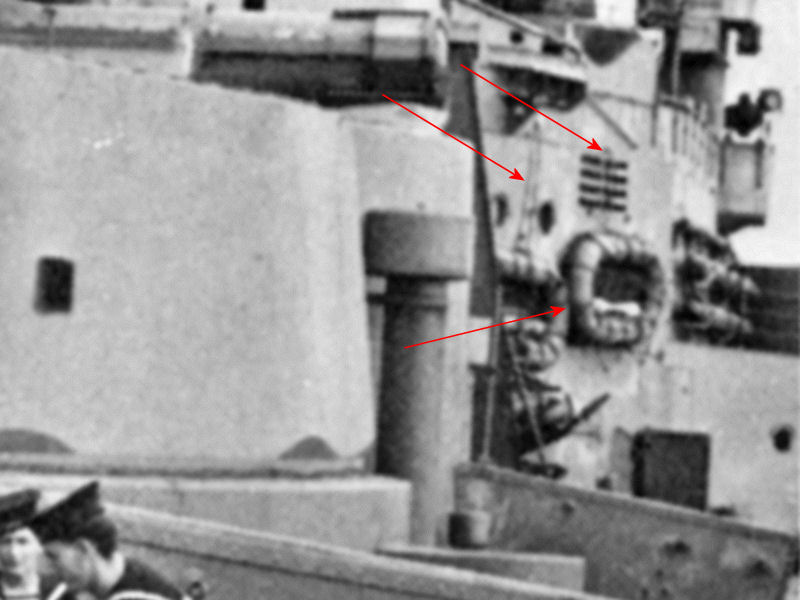
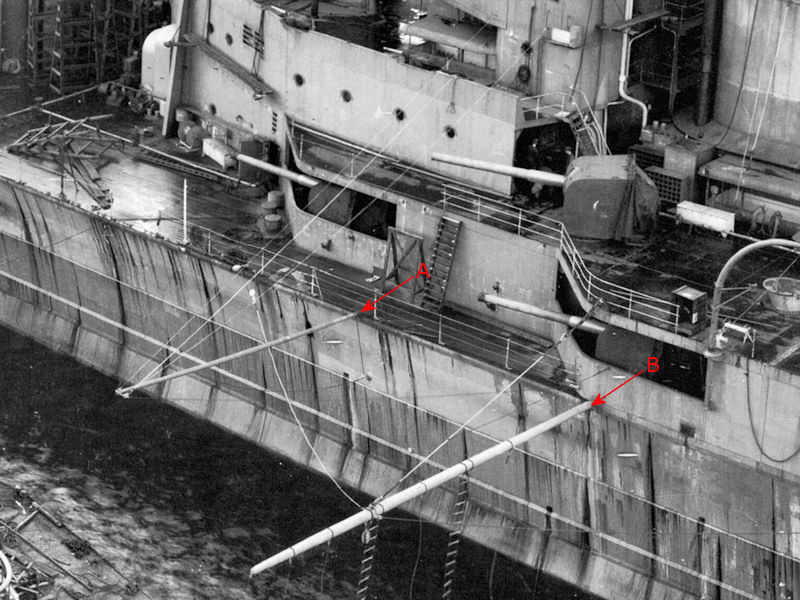
The swinging boom near the quarterdeck bulkhead is very difficult to spot in photographs taken during the war. The stays are easier to spot (A), even though the boom is not (B). Note that the 40ft ammunition derrick at (C) was removed when the air intake in the quarterdeck bulkhead was covered up (D). The stay for the swinging boom is still present in the image bottom right.
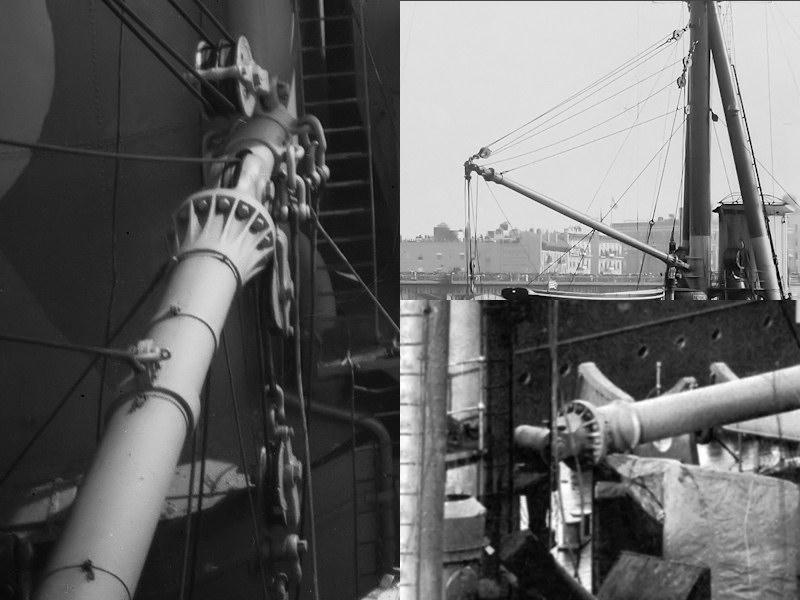
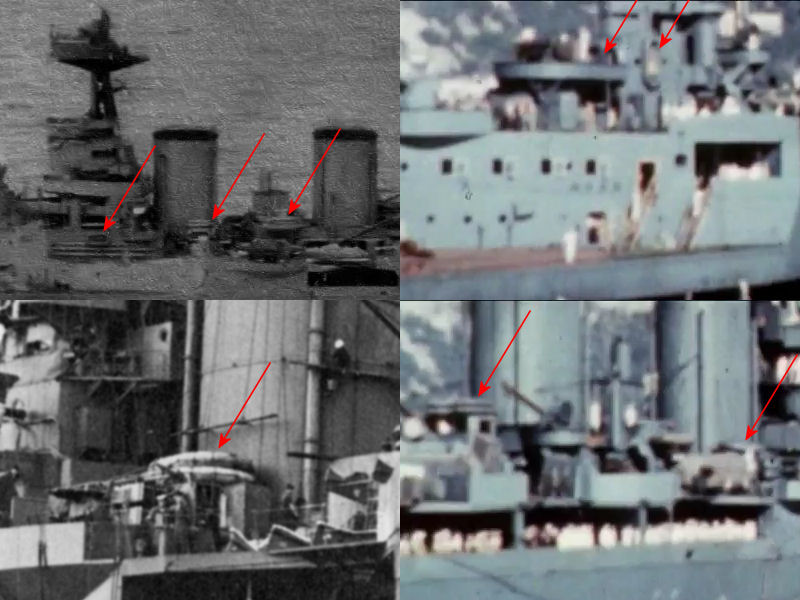
The largest derrick is of course the main derrick operated from the main mast. Here you can seen the main derricks aboard HMS Rodney (left), HMS Inflexible (top right) and HMS Hood (bottom right). The style of the main derrick appears the same for all capital ships and the drawing in the Anatomy of the Ship: HMS Hood is not accurate. There are small changes in the rig of the derrick between ships and the hoist line does not loop back the same number of times for all ships.
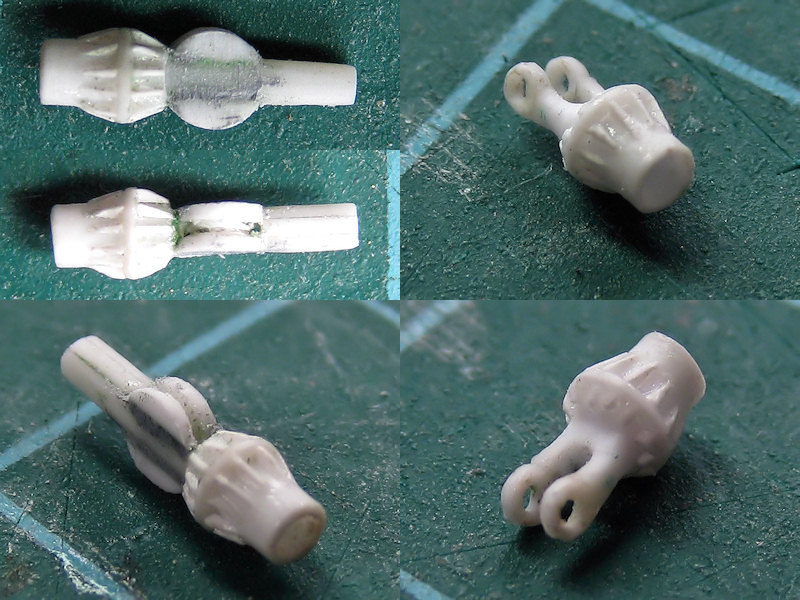
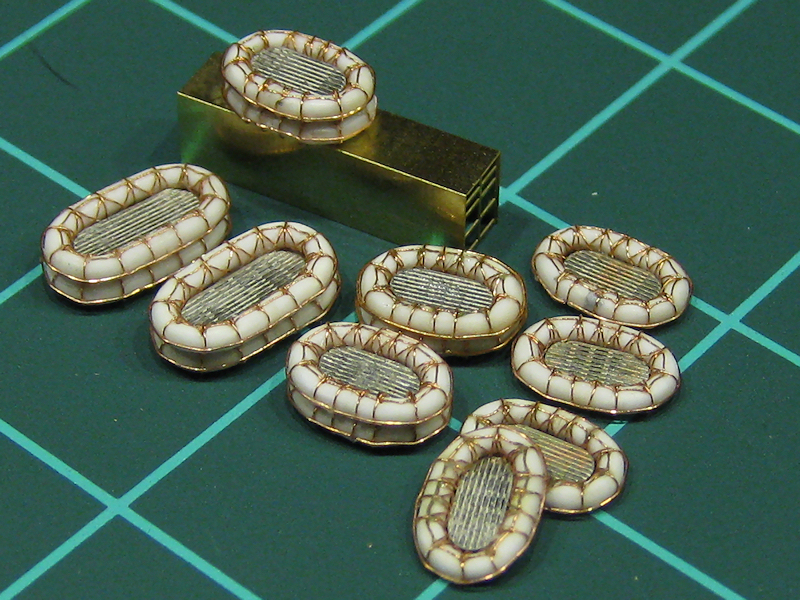
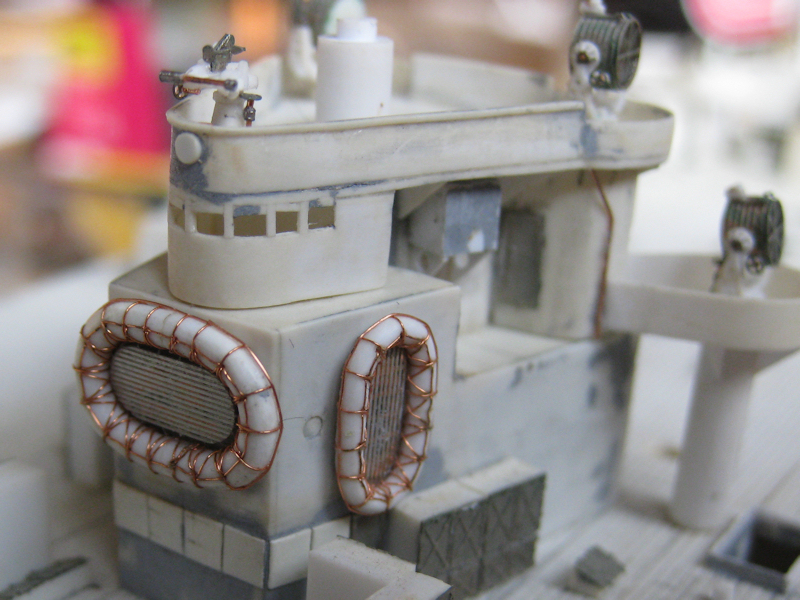
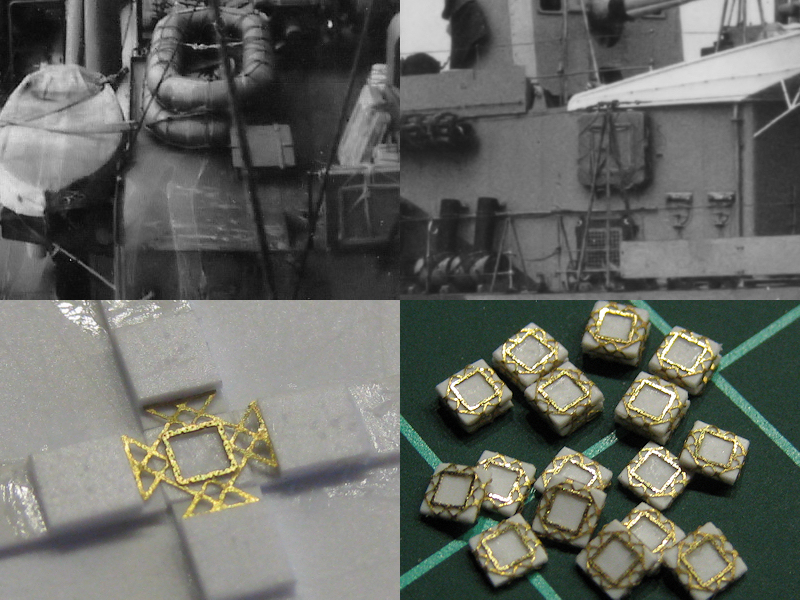
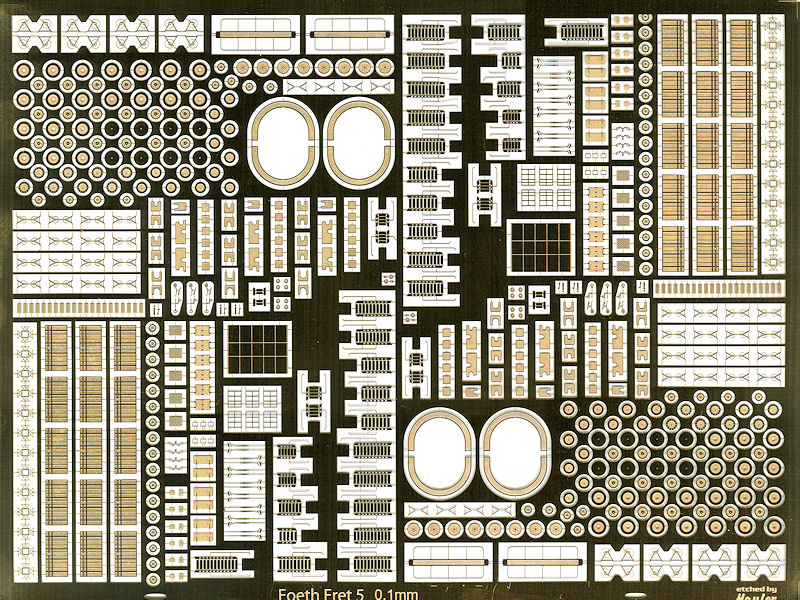
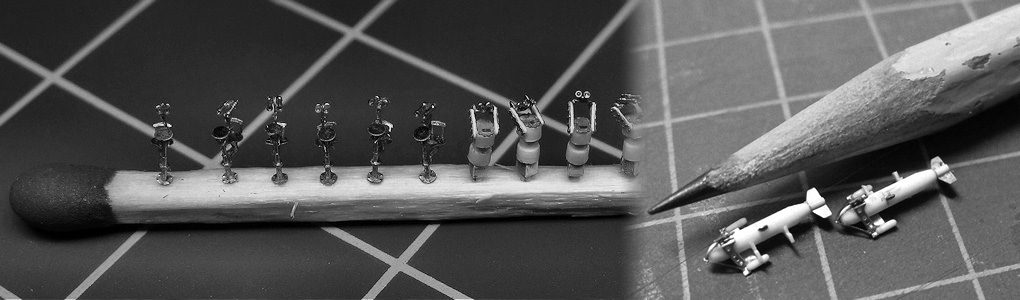
The flange couplings of the main derrick were simulated with tiny triangles added with a very fine pair of tweezers. The pully in the end of the derrick was added as well for proper rigging. The start point of the derrick was ‘milled’ into shape with the cross table of the drill press.
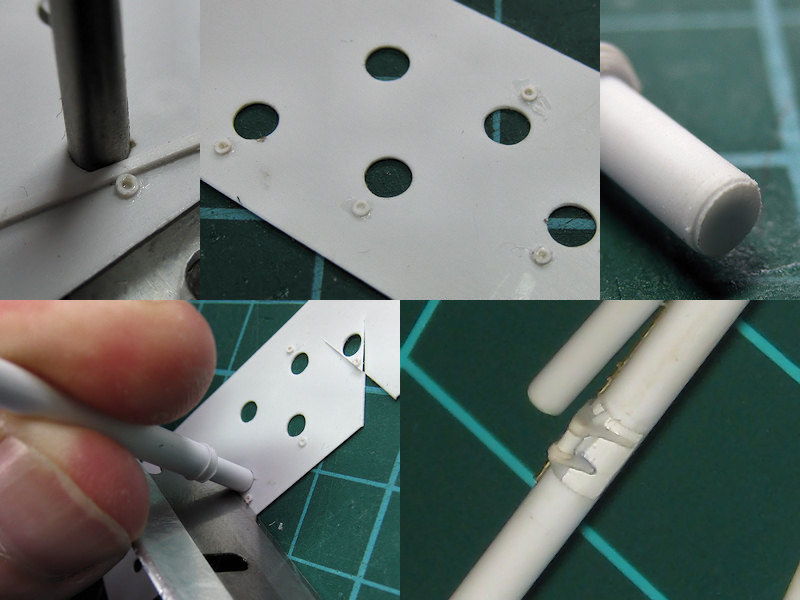
The support on the main mast was built from plastic plate; you don’t always need photo-etch to make such difficult to make shapes (even though I should have).
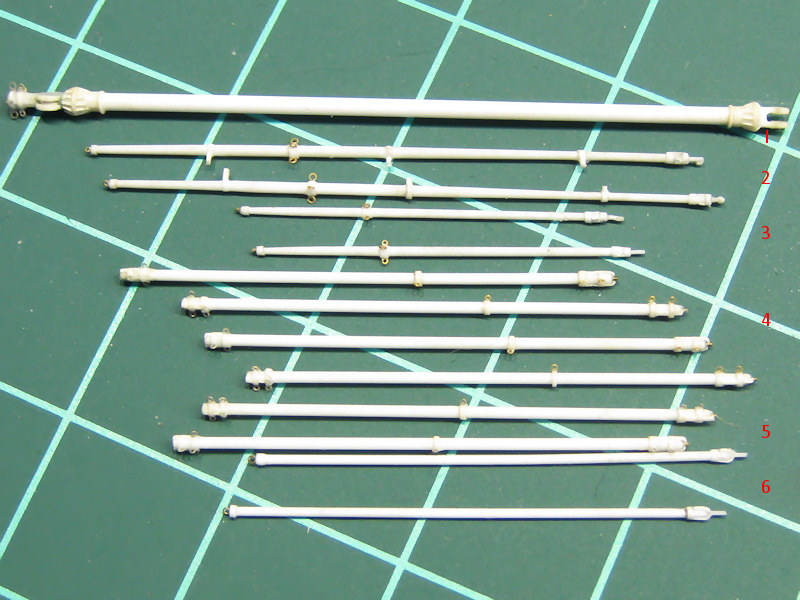
The list comprises of
1 65ft main derrick (1)
2 50ft guest warp booms (2)
2 30ft 6″ swinging booms (3)
4 40ft 4t ammunition derricks (4)
2 40ft 5t boat & ammunition derricks (small cranes) (5)
2 36ft 6in sounding booms (6)
2 12ft paravane derricks, mostly stored
Northcott lists one 8ft derrick present as late as 1931, but I haven’t been able to find any image, so I guess it was stored out of sight with the paravane derricks?
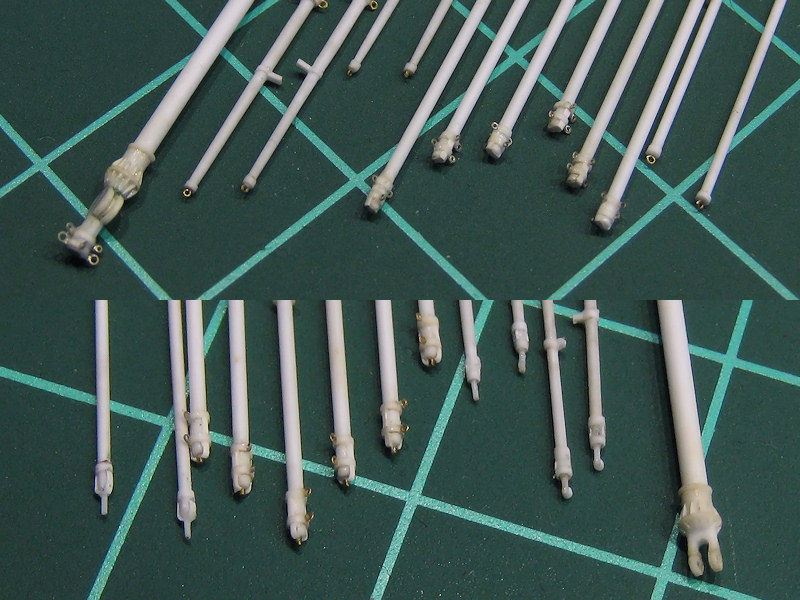
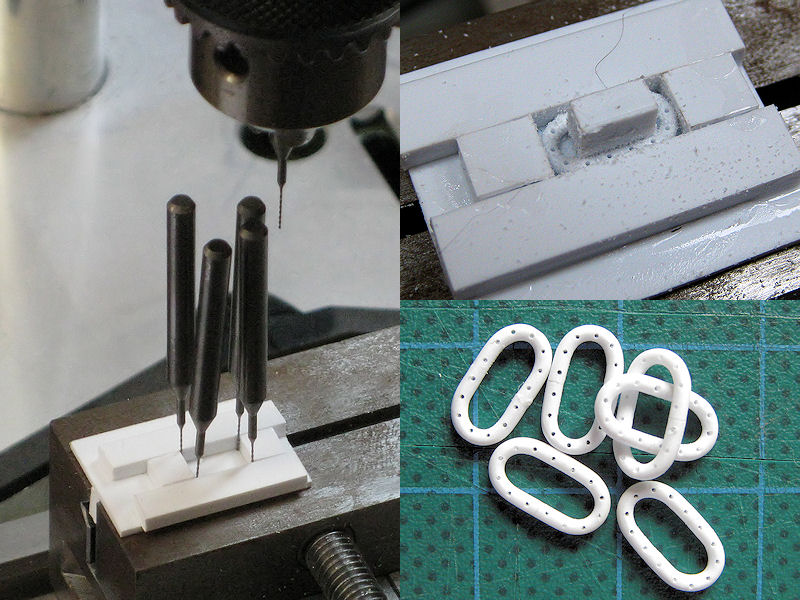
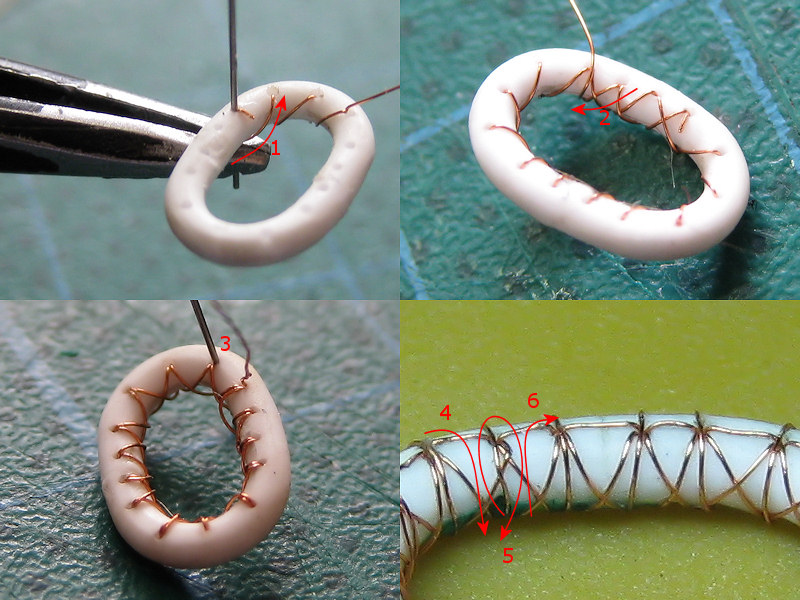
Most work on the derricks was spent adding small rings!
The smaller davits will be treated in a small follow-up post.