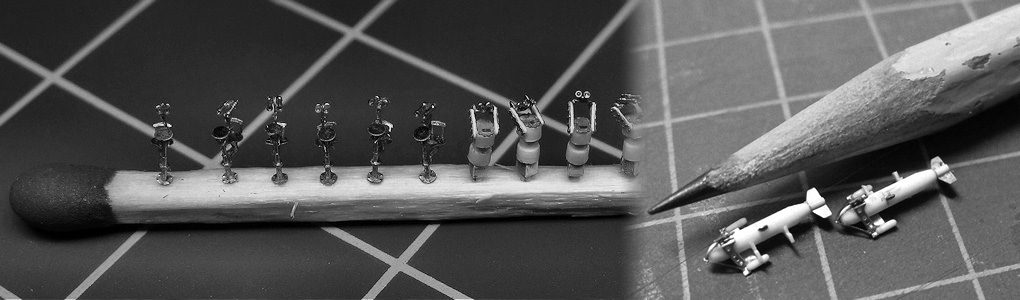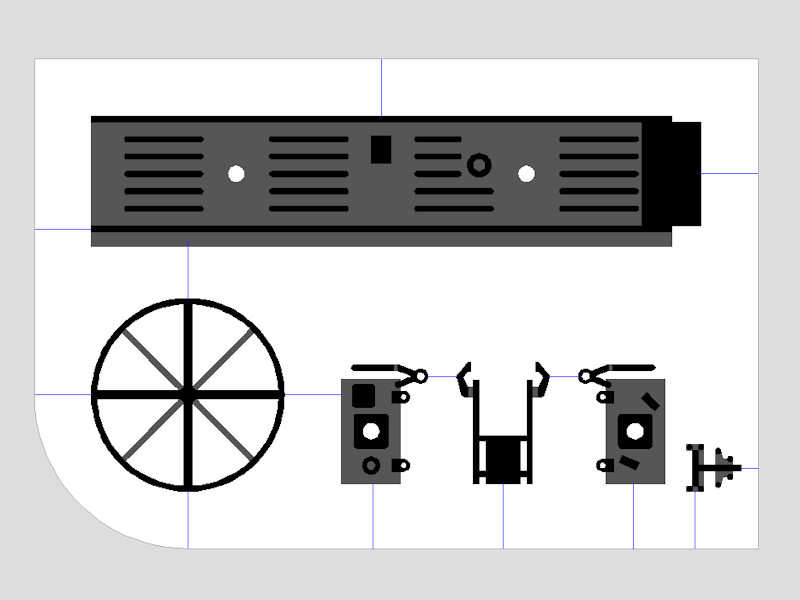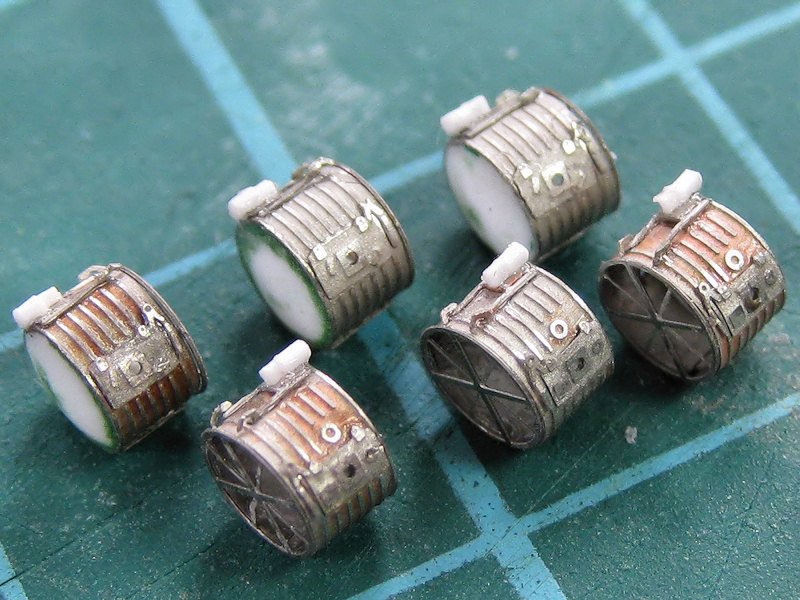
Continuing from part I where I showed the etch design for the new octuple pompoms. I published only the Mk V, but I was working on three models: the pompom guns in question are the octuple Mk V and Mk VI and the quad Mk VII.
The Mk V gun is the prewar version (then called the Mk M, M for multiple) first fitted to HMSs Valiant, Nelson, Rodney, Hood, Furious, Royal Sovereign and Renown. The Mk VI, fitted in 1934 and onward, is nearly the same with minor differences in the platform and gun cradle (central weapon housing). Several capital ships were fitted with one or two of either type, although a shortage of the guns meant that Renown and Valiant initially received only one. Both types were later updated to automated fire resulting in the Mk VA and Mk VIA. Guns designated with a * behind their Mark denote a weapon fitted with guns firing a shell at a higher muzzle velocity. Later versions were remote powered denoted RP10, RP11 and RP50. Most ships were fitted with a mix of versions of both Mks or remote power units. The Mk VII is the quadruple version with again many variants, e.g., the Mk VII*P being the high muzzle-velocity self-contained power mounting. The late war version of both the octuple (Mk VIA* rpxx with the aft part of the mount fully enclosed by shielding) and quad guns (Mk VII P*) are much more complicated to make and are a completely different weapon to model. Of course, John Lambert drawings has all of them but you have to stop somewhere. The differences between the Mk V and Mk VI are slight but as HMS Hood has two Mk Vs and one Mk VI (on the bandstand just behind X-turret) I wanted to have both correctly modeled. I currently do not know for sure how to distinguish between the normal and automatic (A) fire guns or high-velocity versions, but I suspect that the (conical) flash suppressor is typical for the automatic version? Most ships were upgraded to these types of barrel at some point in their life.
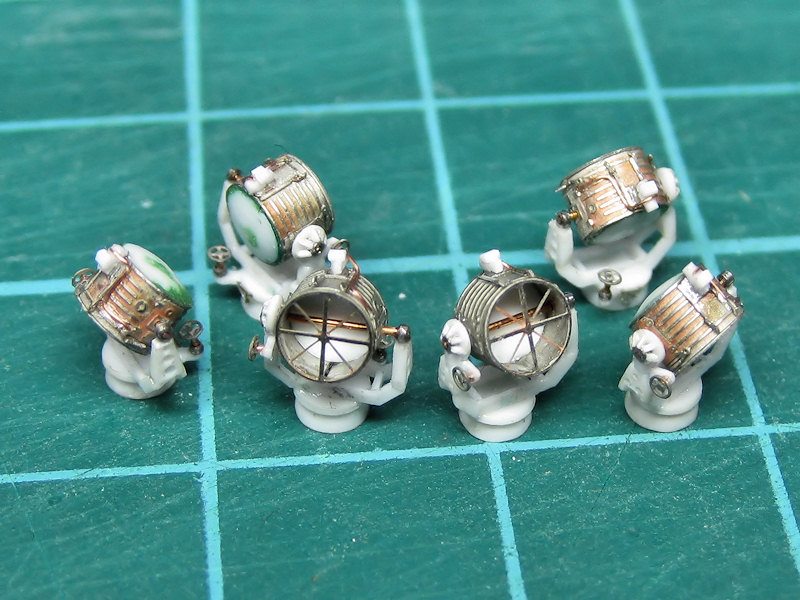
I have prepared a few images showing the early/mid war versions of the weapon and how to recognize them.

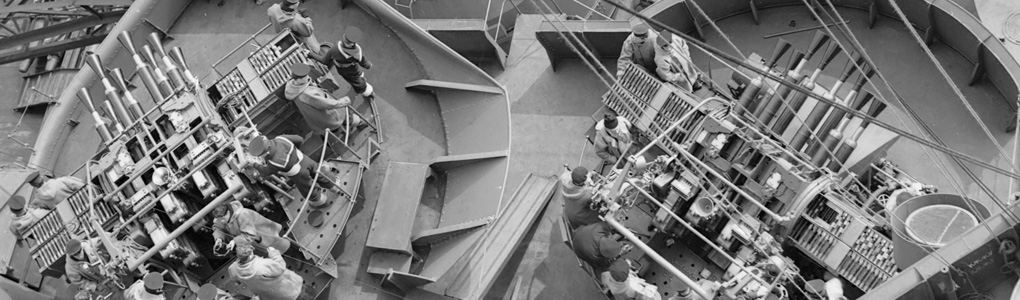
This is an excellent image of a Mk M or Mk V aboard HMS Rodney, taken from Man O’War 3 (1979) by Raven & Roberts. Note the small ‘hatch’ on top of the gun cradle. This is typical for the Mk V. No flash suppressors are seen on this weapon. It appears that the gun sites are already the more modern version than those on the Mk M. Note the two sailors loading the ammunition.
The Mk VIA* is the gun you’ll see on most ships, here aboard HMS Prince of Wales taken from Ensign 1 (1972) by Raven. Note the structure on top of the gun cradle is different and two ridges are visible. This weapon was fitted with flash suppressors at the end of the gun barrels. The early ships of the King George V class were delivered with these weapons, later expanded to as much as eight octuple mountings. Note that the gun sights are the sights as in most photo-etch detail sets, but that these sights do not appear on early versions of the pompoms.

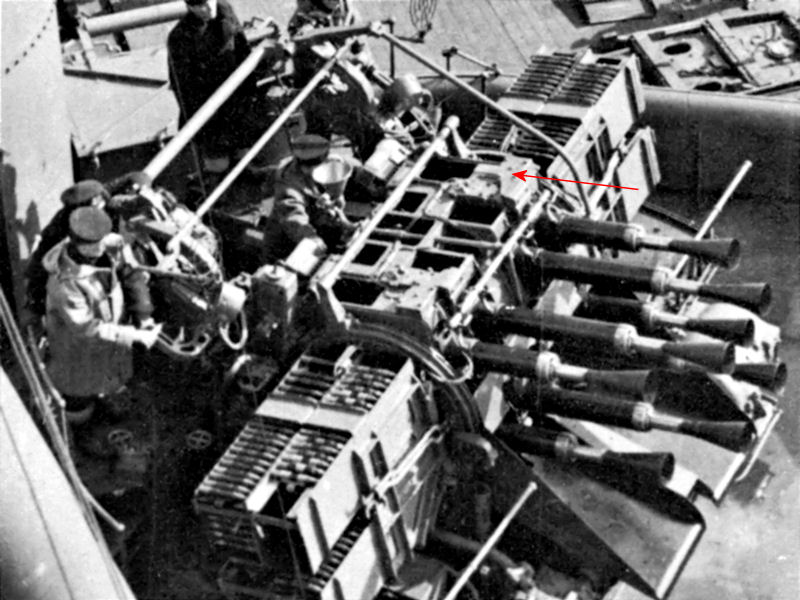
This is an image of a pompom Mk VA* aboard HMS Nelson or Rodney (forgot source). Note the small hatch on the gun cradle in combination of the flash suppressors at the end of the gun barrels, so we can be sure this is a Mk V, not a Mk VI. After both Rodney and Nelson were fitted with more pompoms near their secondary battery, quarterdeck and B-turret (Mk VIA), it appears that the older Mk V weapons received new guns (or were upgraded to version *). Pictures of both battleships—and many others—after fitting the additional modern pom poms show the barrels with the flash suppressors.
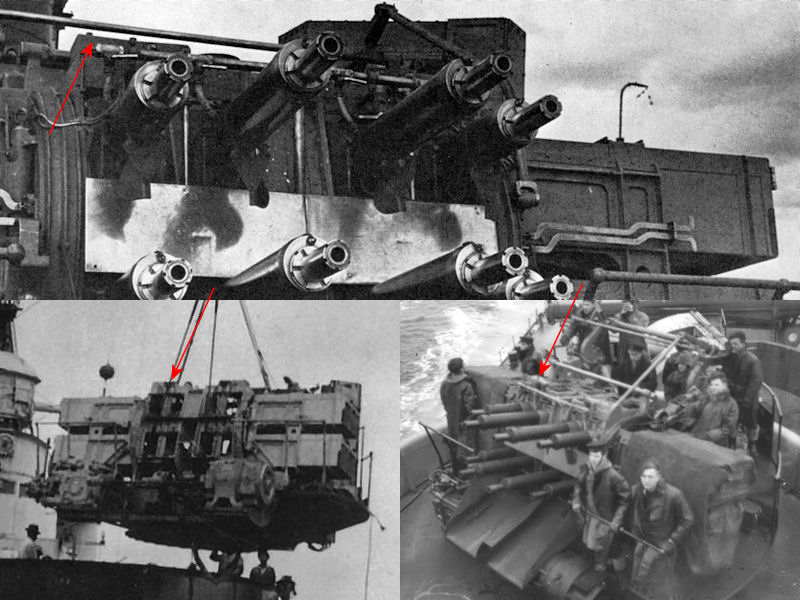
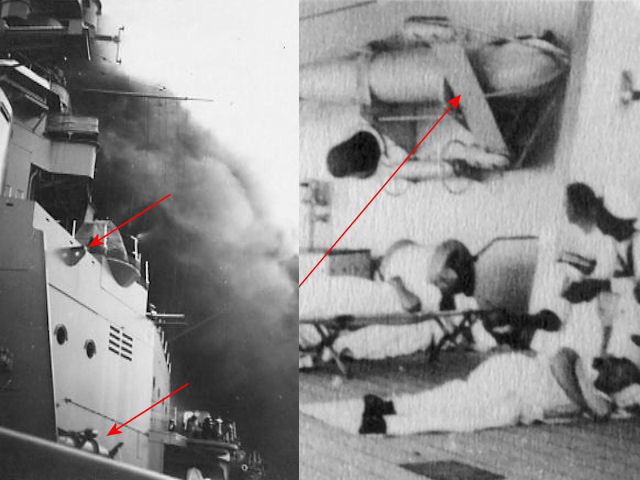
This image shows Mk VIs prior to 1939 without the flash suppressors. Images of this version are a bit harder to find. Note the ridges on top of the gun cradle. The top of the image is part of a photograph taken on board HMS Ark Royal from British Battleships of World War Two (1976) by Raven & Roberts; the two lower images were taken aboard HMS Hood with permission from the official HMS Hood site. Again, the ridge on top of the gun cradle is visible. Note that the weapon was not fitted with flash suppressors at the end of the gun barrels, so those suppressors clearly do not give away the type of mounting version.
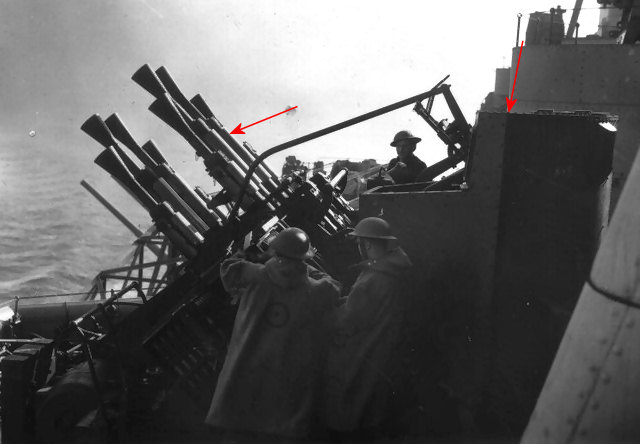
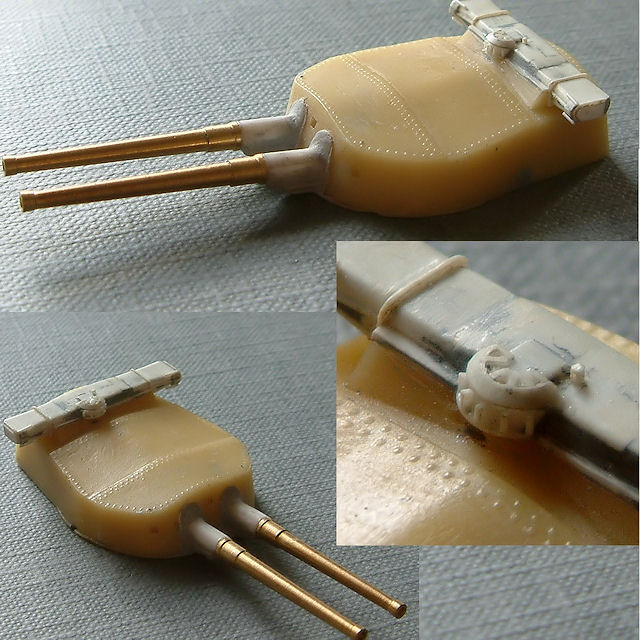
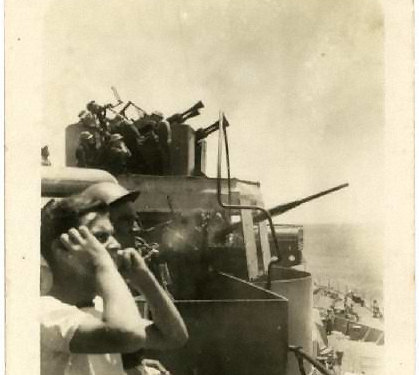
This pom pom has water cooling jackets around the barrels, indicative of it being an RSP mount. Note the splinter shielding on the aft platform of the weapon. HMSs Howe and Anson were fitted with these modern variants. This image is reproduced with permission from Maritime Quest.
I made a small list of what battleship was fitted with what type of weapon and if they were fitted with or without the flash suppressors (new barrels) so you know what gun to place on what ship. This list is based mostly on Raven & Roberts British Battleships of World War Two, one of the few references that state what weapon was fitted, though not in full detail for each ship. The list is complemented and corrected by observation of what pics I could find that clearly show the type of barrel and/or type. It’s not always clear if, for example, if HMS Valiant and HMS Queen Elizabeth retained their older pompoms after their refit, as with HMS Rodney and HMS Nelson, or received all-new units as with HMS Renown. I’ll try to keep this list updated when necessary.
LIST OF GUNS
Last update: June 2010.
* New barrel with conical flash supressor
HMS Queen Elizabeth
1936 2x Mk VI
1941 4 x Mk VI*A
HMS Valiant
1930 1 x Mk V (starboard only)
1932 2 x Mk V
1941 4 x Mk VI*A
HMS Barham
1934 2 x Mk VI
1941 4 x Mk VI*
HMS Warspite
1934-36 1 x Mk V , 1 x Mk VI
1937 1 x Mk V , 3 x Mk VI (4 x Mk VI*?, new barrels)
Images taken in 1937 show old barrels, but new barrels in 1943. Replaced during the refit in 1942? All units replaced?
1941 1 x Mk *V , 3 x Mk V*I
HMS Malaya
??? 1 x Mk V, 1 x Mk VI
1941 1 x Mk V*, 3 x Mk VI*
HMS Hood
1931 2 x Mk M
1938 2 x Mk M, 1 x Mk VI
HMS Renown
1932 1 x Mk V (port side not fitted)
1936 1 x Mk V, 1 x Mk VI
1939 3 x Mk VI*A (all replaced)
HMS Repulse
1934 2 x Mk VI
1940 3 x Mk VI
HMS Rodney
1932/33 2 x Mk V Abreast forward side funnel
1938 2 x Mk V, 1 Mk VI*A (aft deck)

This image taken in October 1940 shows the new type of barrel aboard HMS Rodney. Image from the Imperial War Museum Collections Online Database.
1941 2 x Mk V*, 3x Mk VI* (one on aft deck) 1 Mk VII* on B-turret
HMS Nelson
1934 2 x Mk V Abreast forward side funnel
1940 3 x Mk V (one on Q-deck), + 2 x Mk VI (in place of secondary director-control tower)
1941-1942 3 x Mk V*, 2 x Mk VI* + 1 Mk VI* on B-turret (6)
HMS Resolution
1936 2 x Mk V/VI?
1941 2 x Mk V/VI* , 2 x Mk VI*I (B-turret, Q-deck)
This image of HMS Resolution from the HMS Resolution association shows new barrels for the quadruple pompoms.
HMS Revenge
1931 1 x Mk V (starboard only)
1939 1 x Mk V, 1 x Mk V/VI (type not know, probably Mk VI)
1941 1 x Mk V*, 1 x Mk V/VI*?, 2 x Mk VII* (B-turret, X-turrets)
HMS Royal Oak
1934 2 x Mk VI
HMS Royal Sovereign
1932 2 x Mk V
1942 2 x Mk V*, 2 x Mk VII* (B-turret, X-turret,)
HMS Ramillies
1934 2 x Mk VI
1941 2 x Mk VI*, 2 x Mk VII* (B-turret, X-turret)
This image from 1944 is reproduced with permission by Mick French & the HMS Ramillies Association, showing new barrels on the excentrically placed quad pompoms.
King George V class
All ships had the Mk VI or later with the new barrel
HMS King George V
1940 4 x Mk VI*
1941 5 x Mk VI*, 1 x Mk VII* (Y-turret)
1944 8 x Mk VI*
HMS Prince of Wales
1941 March 4 x Mk VI*
1941 July 5 x Mk VI*, 1 x Mk VII*
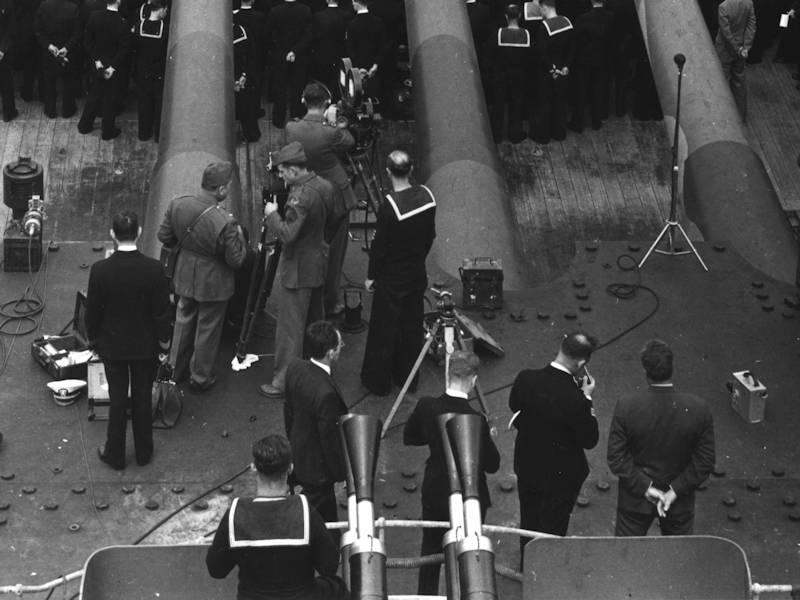
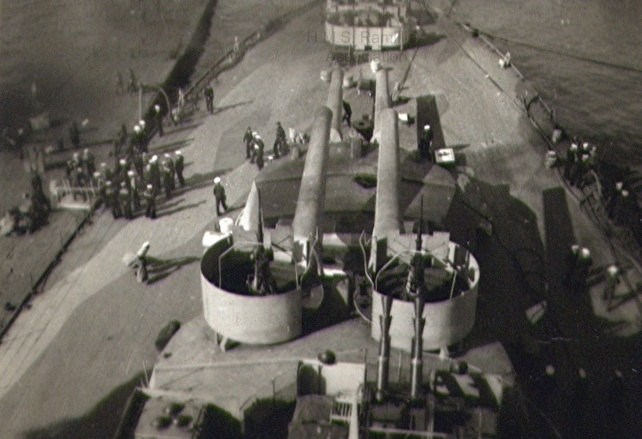
This image taken during the Atlantic Charter clearly shows that a quad pompom was fitted to HMS Prince of Wales’ Y-turret, still present on images taken as late as December 1941; she never carried an octuple pompom in this location. (courtesy of the United Nations
HMS Duke of York
6 x Mk VI*
1946 8 x Mk V*I, 6 x Mk VII*
HMS Anson
1942 6 x Mk VI* RSP?
1944 8 x Mk VI* RSP?, 4 x MK VII*
HMS Howe
1942 6 x Mk VI* RSP?
1944 8 x Mk VI* RSP?,
1945 8 x Mk VI* RSP?, 6 x Mk VII*